一、文档前言
(一)搭建环境
系统:linux
镜像:红帽7.6
配置:2C+4G
虚拟机下载地址:点击下载,里面有server端与agent端,root密码为123@.com。
(二)观前必看
黑色方框内的是命令或者是配置文件内的内容
二、Server端
(一)前期工作
1.防火墙
1.1服务器
开启10050、10051这两个端口。
1.2本地虚拟机
关闭防火墙
systemctl stop firewalld && systemctl disable firewalld
2.关闭SELinux
setenforce 0
sed -i "s/SELINUX=enforcing/SELINUX=disabled/g" /etc/selinux/config
3.安装zabbix
rpm -Uvh https://repo.zabbix.com/zabbix/5.0/rhel/7/x86_64/zabbix-release-5.0-1.el7.noarch.rpm
(二)配置zabbix
1.编辑配置文件
yum -y install vim && vim /etc/yum.repos.d/zabbix.repo
更改前的文件
[zabbix]
name=Zabbix Official Repository - $basearch
baseurl=http://repo.zabbix.com/zabbix/5.0/rhel/7/$basearch/
enabled=1
gpgcheck=1
gpgkey=file:///etc/pki/rpm-gpg/RPM-GPG-KEY-ZABBIX-A14FE591

[zabbix-frontend]
name=Zabbix Official Repository frontend - $basearch
baseurl=http://repo.zabbix.com/zabbix/5.0/rhel/7/$basearch/frontend
enabled=0
gpgcheck=1
gpgkey=file:///etc/pki/rpm-gpg/RPM-GPG-KEY-ZABBIX-A14FE591

[zabbix-debuginfo]
name=Zabbix Official Repository debuginfo - $basearch
baseurl=http://repo.zabbix.com/zabbix/5.0/rhel/7/$basearch/debuginfo/
enabled=0
gpgkey=file:///etc/pki/rpm-gpg/RPM-GPG-KEY-ZABBIX-A14FE591
gpgcheck=1

[zabbix-non-supported]
name=Zabbix Official Repository non-supported - $basearch
baseurl=http://repo.zabbix.com/non-supported/rhel/7/$basearch/
enabled=1
gpgkey=file:///etc/pki/rpm-gpg/RPM-GPG-KEY-ZABBIX
gpgcheck=1
更改后的文件
http变https 0变1
[zabbix]
name=Zabbix Official Repository - $basearch
baseurl=https://repo.zabbix.com/zabbix/5.0/rhel/7/$basearch/
enabled=1
gpgcheck=1
gpgkey=file:///etc/pki/rpm-gpg/RPM-GPG-KEY-ZABBIX-A14FE591

[zabbix-frontend]
name=Zabbix Official Repository frontend - $basearch
baseurl=https://repo.zabbix.com/zabbix/5.0/rhel/7/$basearch/frontend
enabled=1
gpgcheck=1
gpgkey=file:///etc/pki/rpm-gpg/RPM-GPG-KEY-ZABBIX-A14FE591

[zabbix-debuginfo]
name=Zabbix Official Repository debuginfo - $basearch
baseurl=https://repo.zabbix.com/zabbix/5.0/rhel/7/$basearch/debuginfo/
enabled=1
gpgkey=file:///etc/pki/rpm-gpg/RPM-GPG-KEY-ZABBIX-A14FE591
gpgcheck=1

[zabbix-non-supported]
name=Zabbix Official Repository non-supported - $basearch
baseurl=https://repo.zabbix.com/non-supported/rhel/7/$basearch/
enabled=1
gpgkey=file:///etc/pki/rpm-gpg/RPM-GPG-KEY-ZABBIX
gpgcheck=1
2.建立缓存
yum clean all && yum makecache
3.安装zabbix服务端组件
yum -y install zabbix-server-mysql zabbix-web-mysql zabbix-get
4.安装zabbix前端组件
yum -y install centos-release-scl
5.安装zabbix必要组件
yum -y install zabbix-web-mysql-scl zabbix-apache-conf-scl
6.安装MySQL数据库
6.1下载并解压安装包
yum -y install wegt && wget https://houxiongxiong-1310114553.cos.ap-chengdu.myqcloud.com/rpm/mysql-5.7.29-1.el7.x86_64.rpm-bundle.tar && tar xvf mysql-5.7.29-1.el7.x86_64.rpm-bundle.tar
6.2卸载mariadb数据库
[root@HYX-zabbix-server ~]# rpm -qa | grep mariadb
mariadb-libs-5.5.60-1.el7_5.x86_64
[root@HYX-zabbix-server ~]# rpm -e --nodeps mariadb-libs-5.5.60-1.el7_5.x86_64
[root@HYX-zabbix-server ~]# rpm -qa | grep mariadb
6.3安装mysql
rpm -ivh mysql-community-common-5.7.29-1.el7.x86_64.rpm; \
rpm -ivh mysql-community-libs-5.7.29-1.el7.x86_64.rpm; \
rpm -ivh mysql-community-client-5.7.29-1.el7.x86_64.rpm; \
rpm -ivh mysql-community-libs-compat-5.7.29-1.el7.x86_64.rpm; \
rpm -ivh mysql-community-server-5.7.29-1.el7.x86_64.rpm --nodeps;
6.4启动服务
systemctl start mysqld; \
systemctl enable mysqld; \
systemctl status mysqld;
6.5查看临时密码
[root@HYX-zabbix-server mysql]# grep password /var/log/mysqld.log
2023-06-18T06:42:51.182944Z 1 [Note] A temporary password is generated for root@localhost: 6:,UQhw.Vw9N
6.6修改密码
mysql -uroot -p'6:,UQhw.Vw9N'
set global validate_password_policy=0;
set global validate_password_length=6;
alter user user() identified by '123456';
7.创建数据库
create database zabbix character set utf8 collate utf8_bin;
create user zabbix@localhost identified by 'Zabbix@123';
grant all privileges on zabbix.* to zabbix@localhost;
quit
8.导入zabbix初始数据库
zcat /usr/share/doc/zabbix-server-mysql*/create.sql.gz | mysql -uzabbix -p'Zabbix@123' zabbix
(三)配置初始化
1.配置数据库连接信息
显示行号命令 set nu
修改位置在91、98、114、124行,去掉#
DBHost=localhost
DBName=zabbix
DBUser=zabbix
DBPassword=Zabbix@123
vim /etc/zabbix/zabbix_server.conf
2.配置时区信息
修改位置在最后一行
vim /etc/opt/rh/rh-php72/php-fpm.d/zabbix.conf
修改前
php_value[max_input_vars] = 10000
; php_value[date.timezone] = Europe/Riga
修改后
php_value[max_input_vars] = 10000
php_value[date.timezone] = Asia/Shanghai
3.配置字体
yum -y install wqy-microhei-fonts
mv /usr/share/fonts/dejavu/DejaVuSans.ttf /usr/share/fonts/dejavu/DejaVuSans.ttf.bak
cp -f /usr/share/fonts/wqy-microhei/wqy-microhei.ttc /usr/share/fonts/dejavu/DejaVuSans.ttf
4.启动zabbix相关服务
systemctl restart zabbix-server httpd rh-php72-php-fpm
systemctl enable zabbix-server httpd rh-php72-php-fpm
(四)web端配置
访问地址:http://192.168.138.91/zabbix //自行修改IP
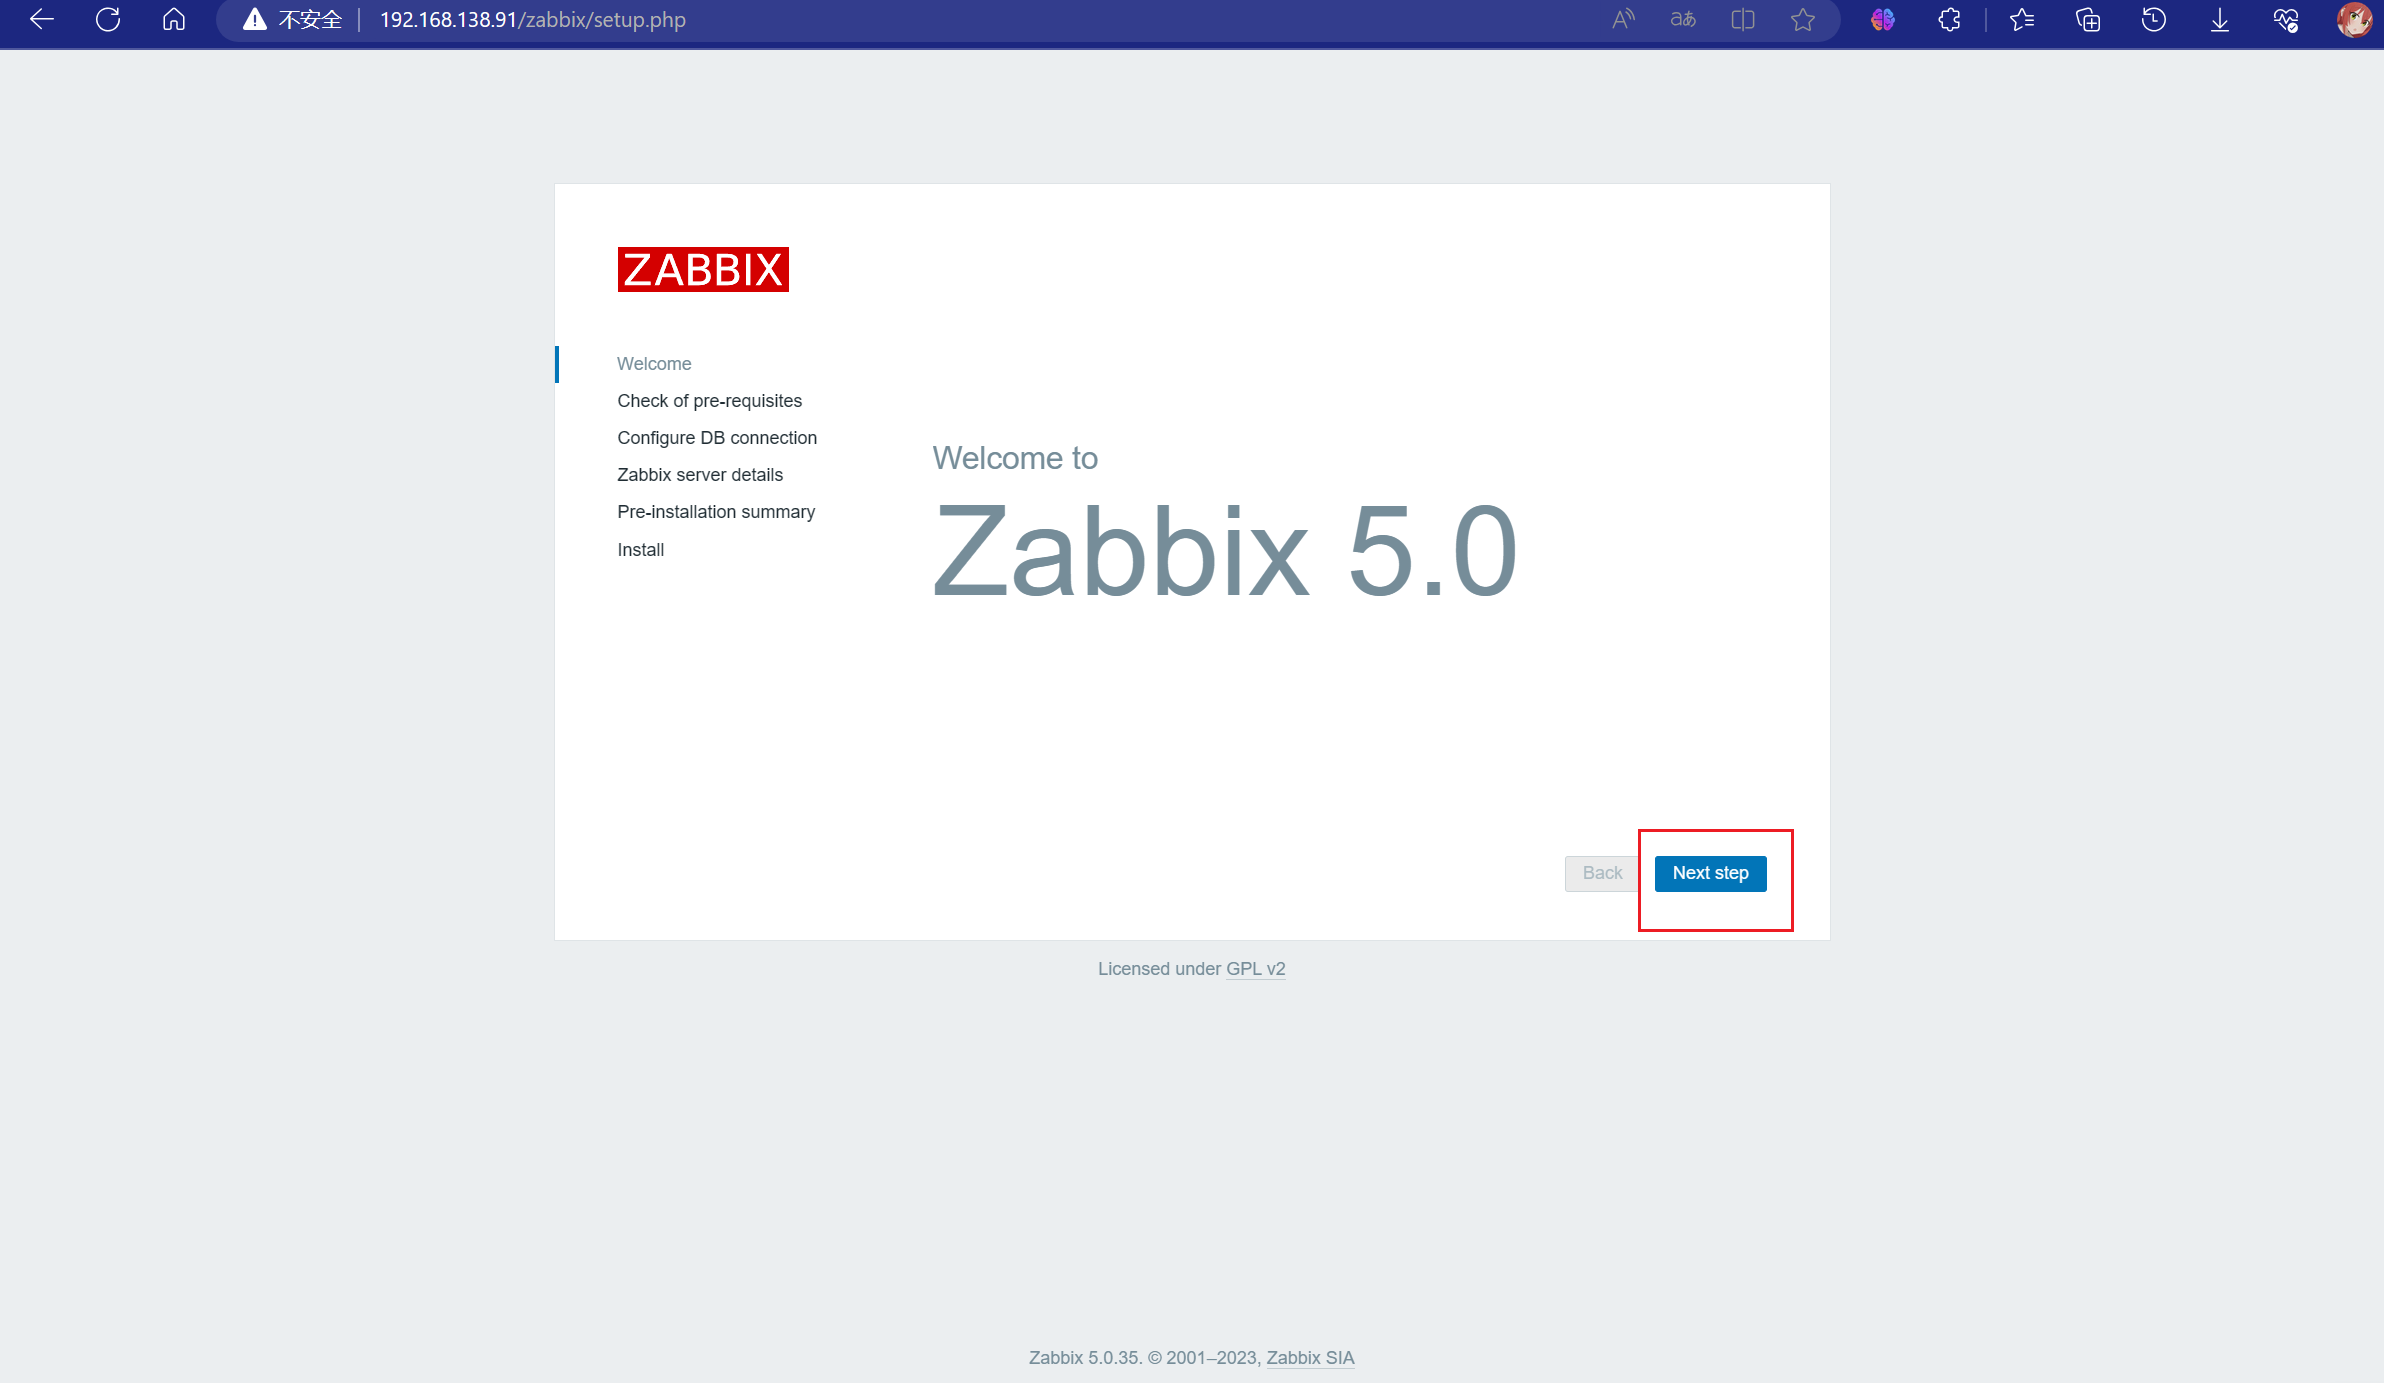
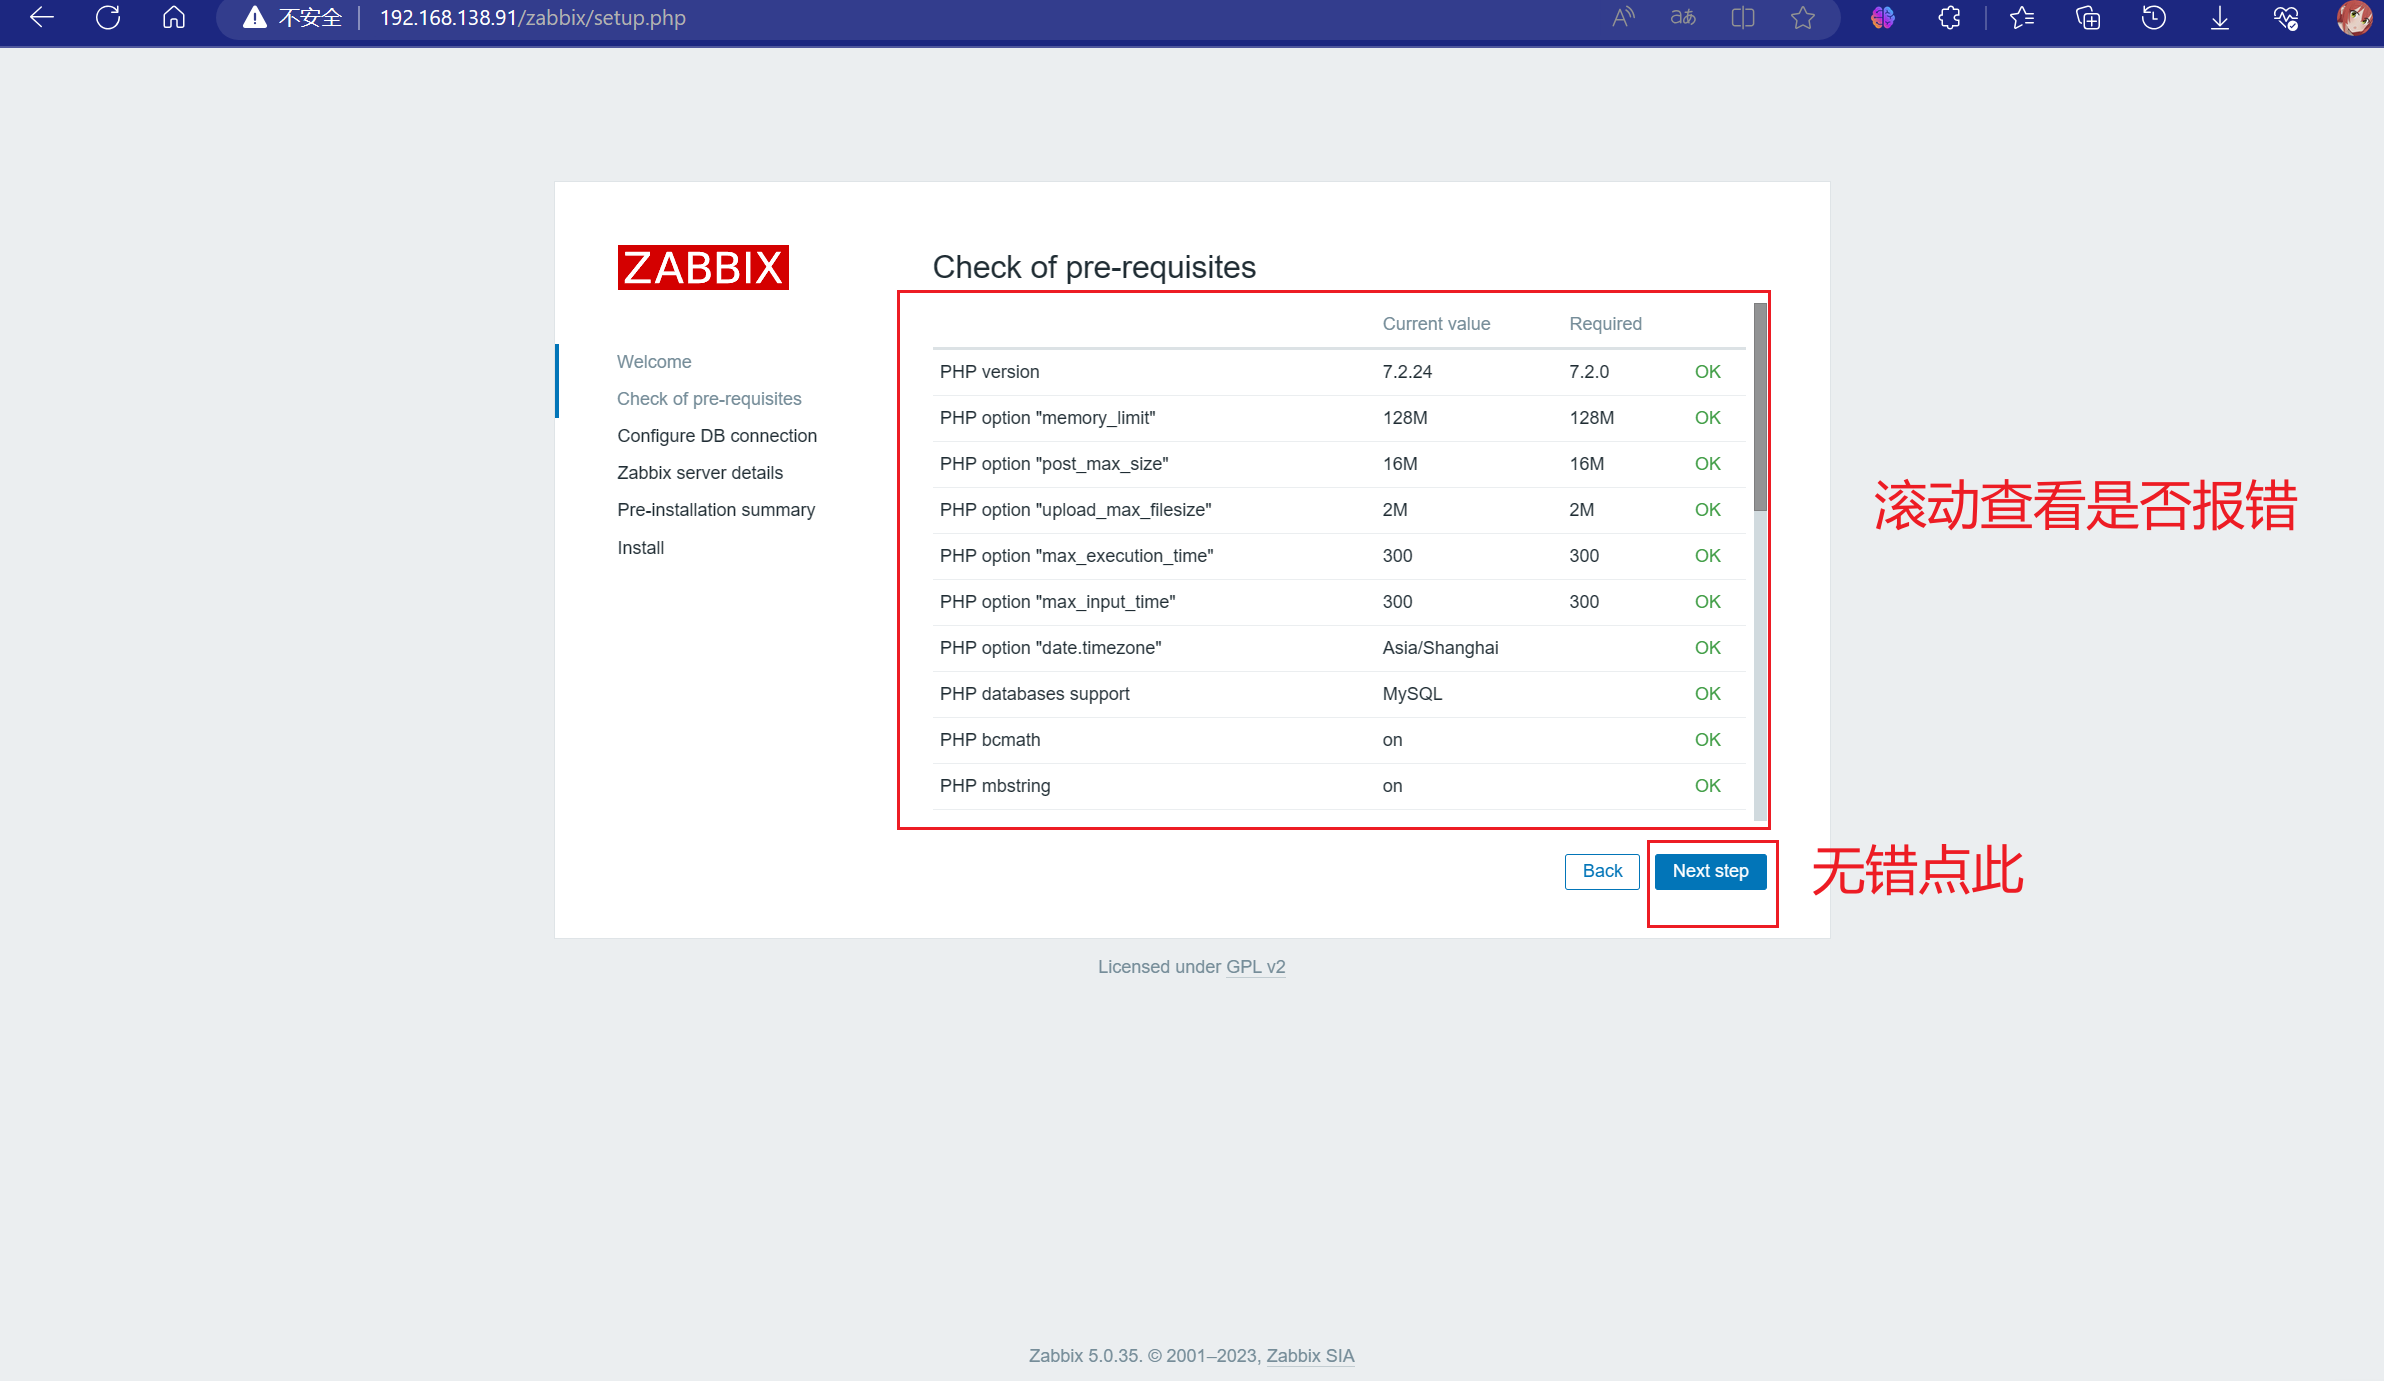
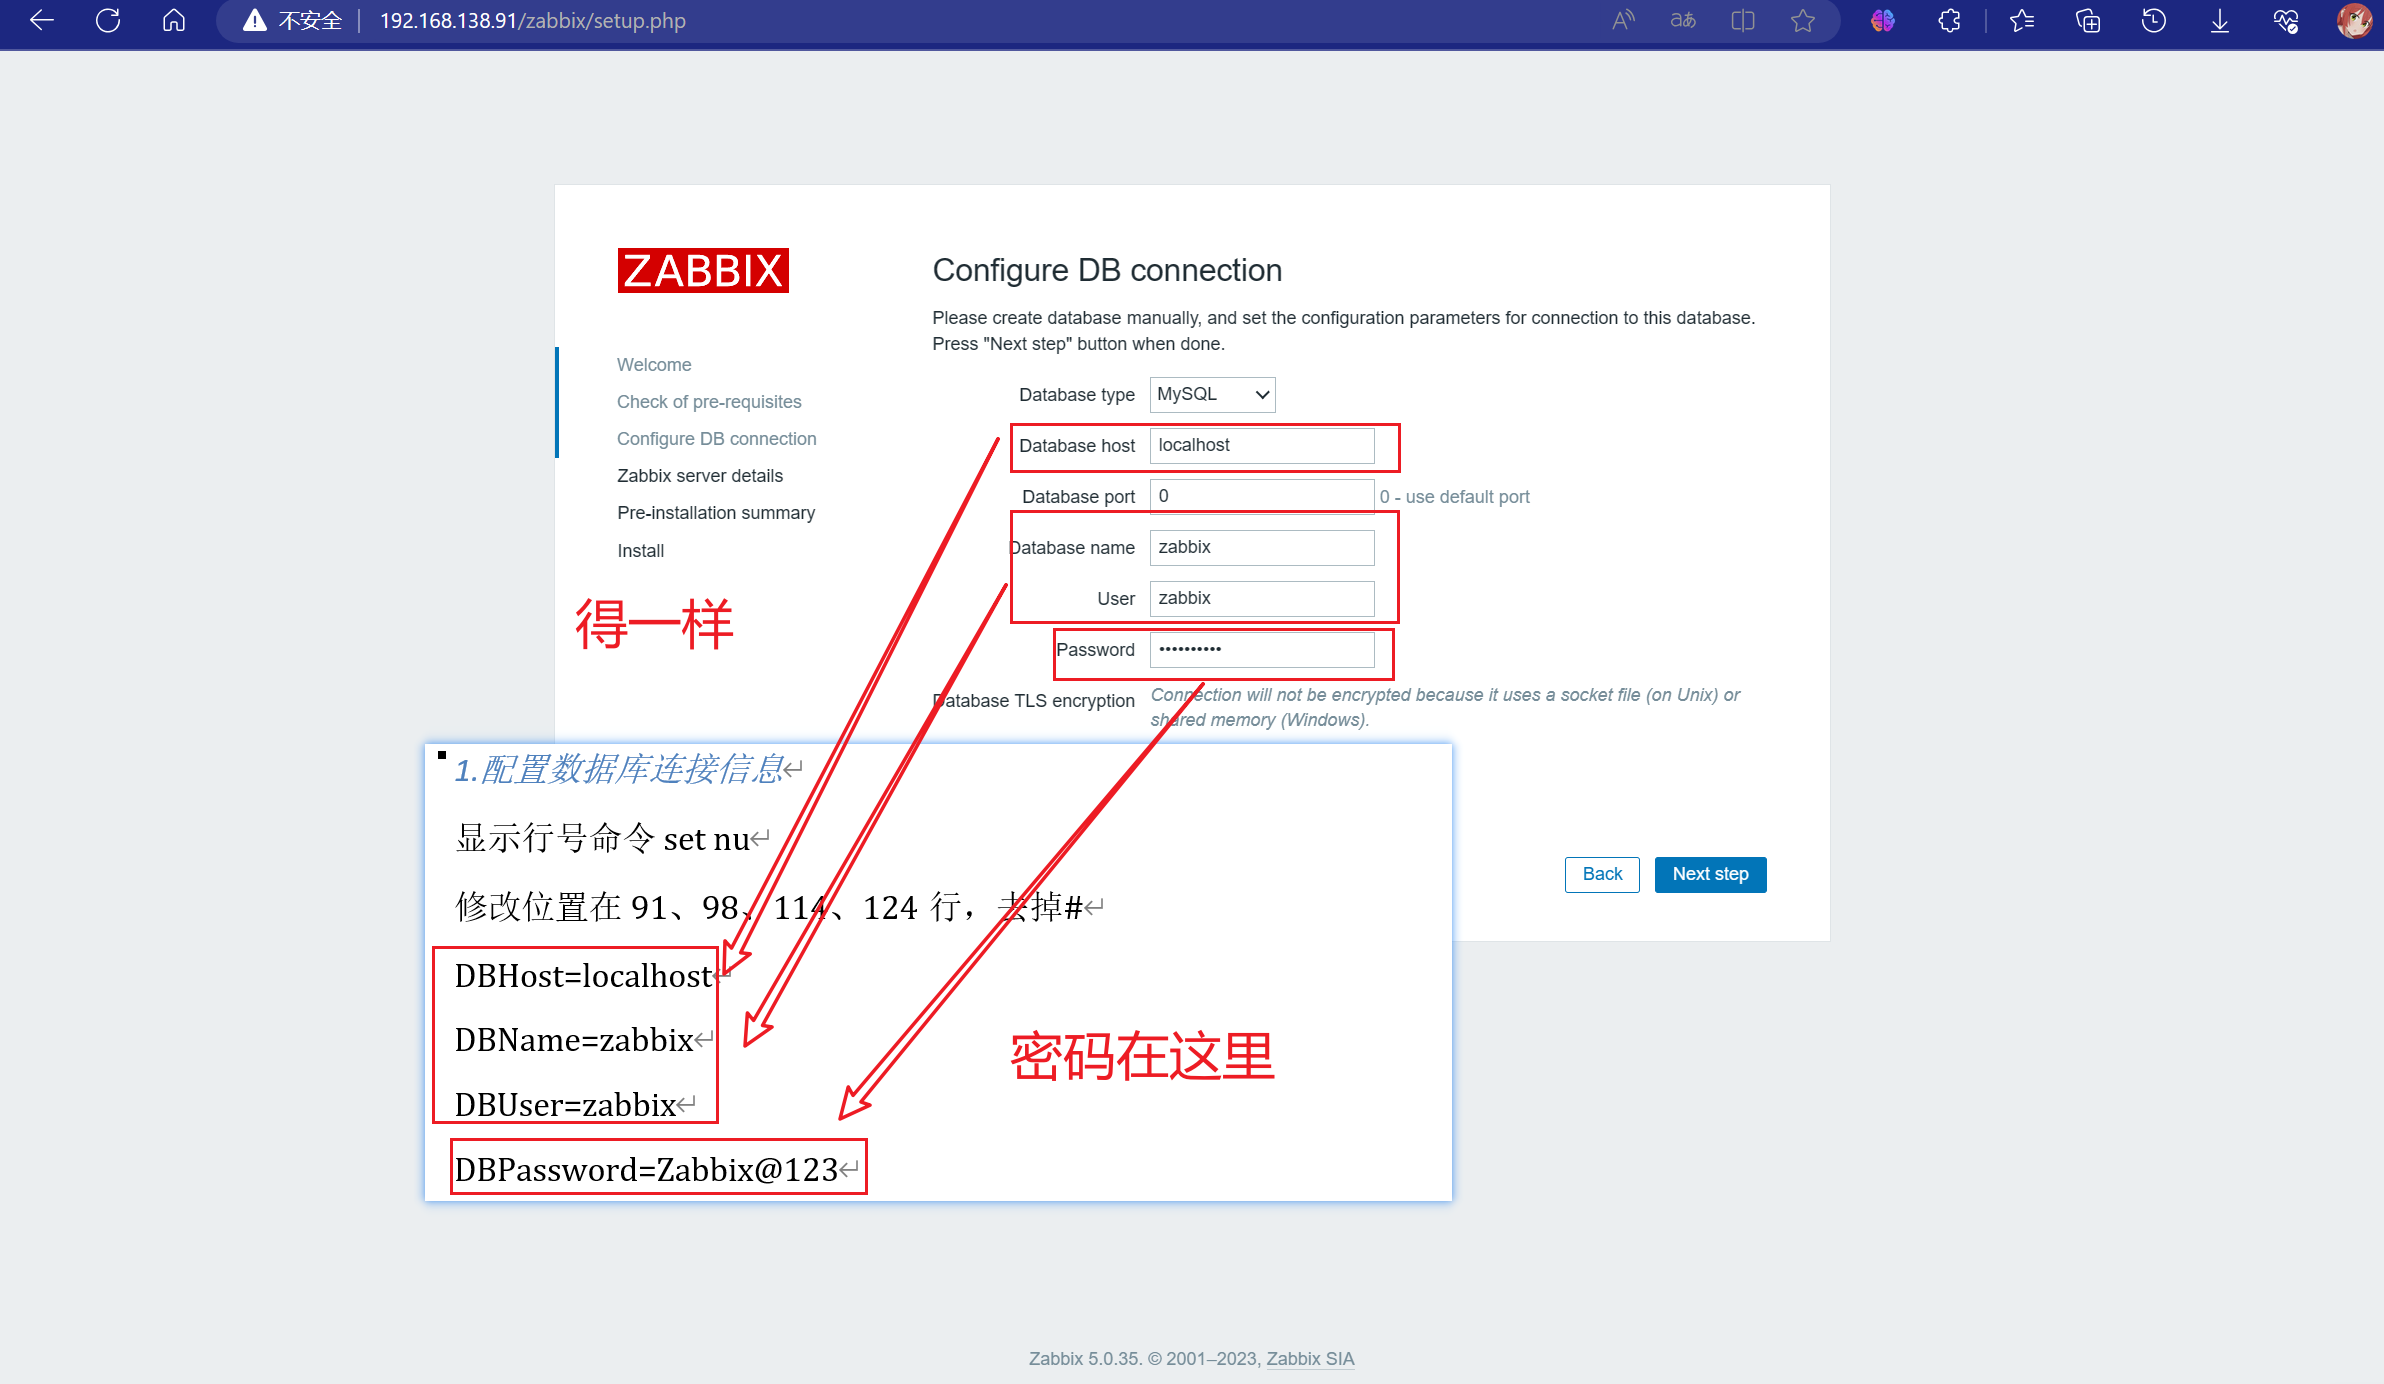
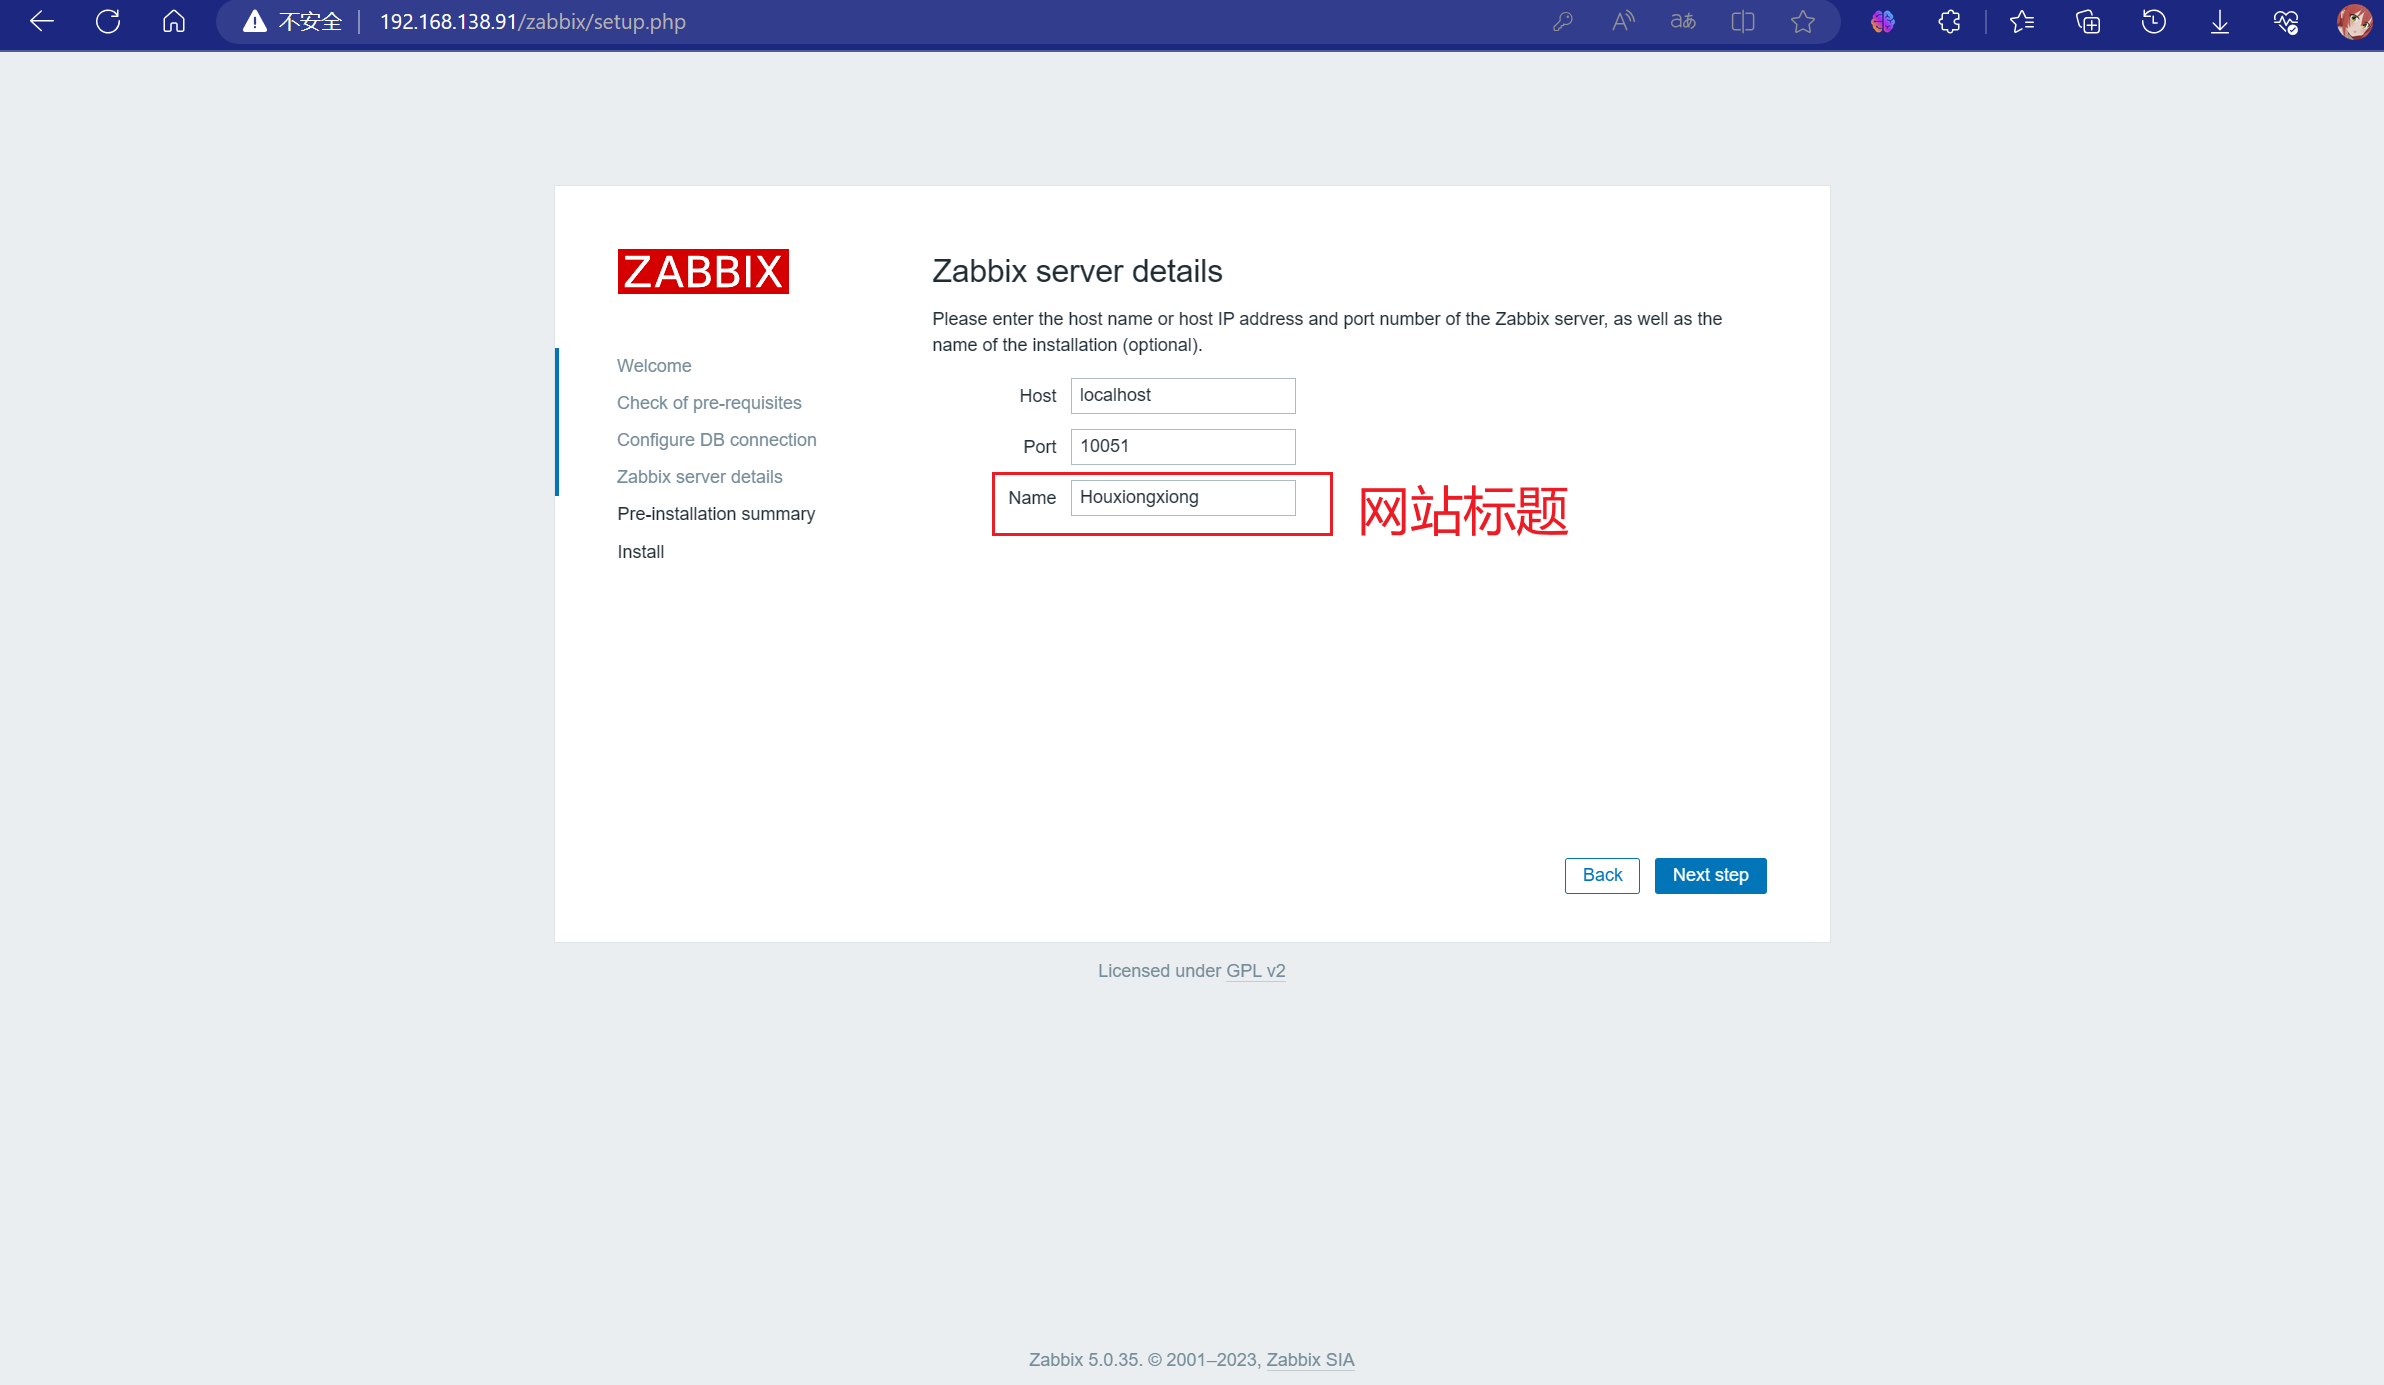
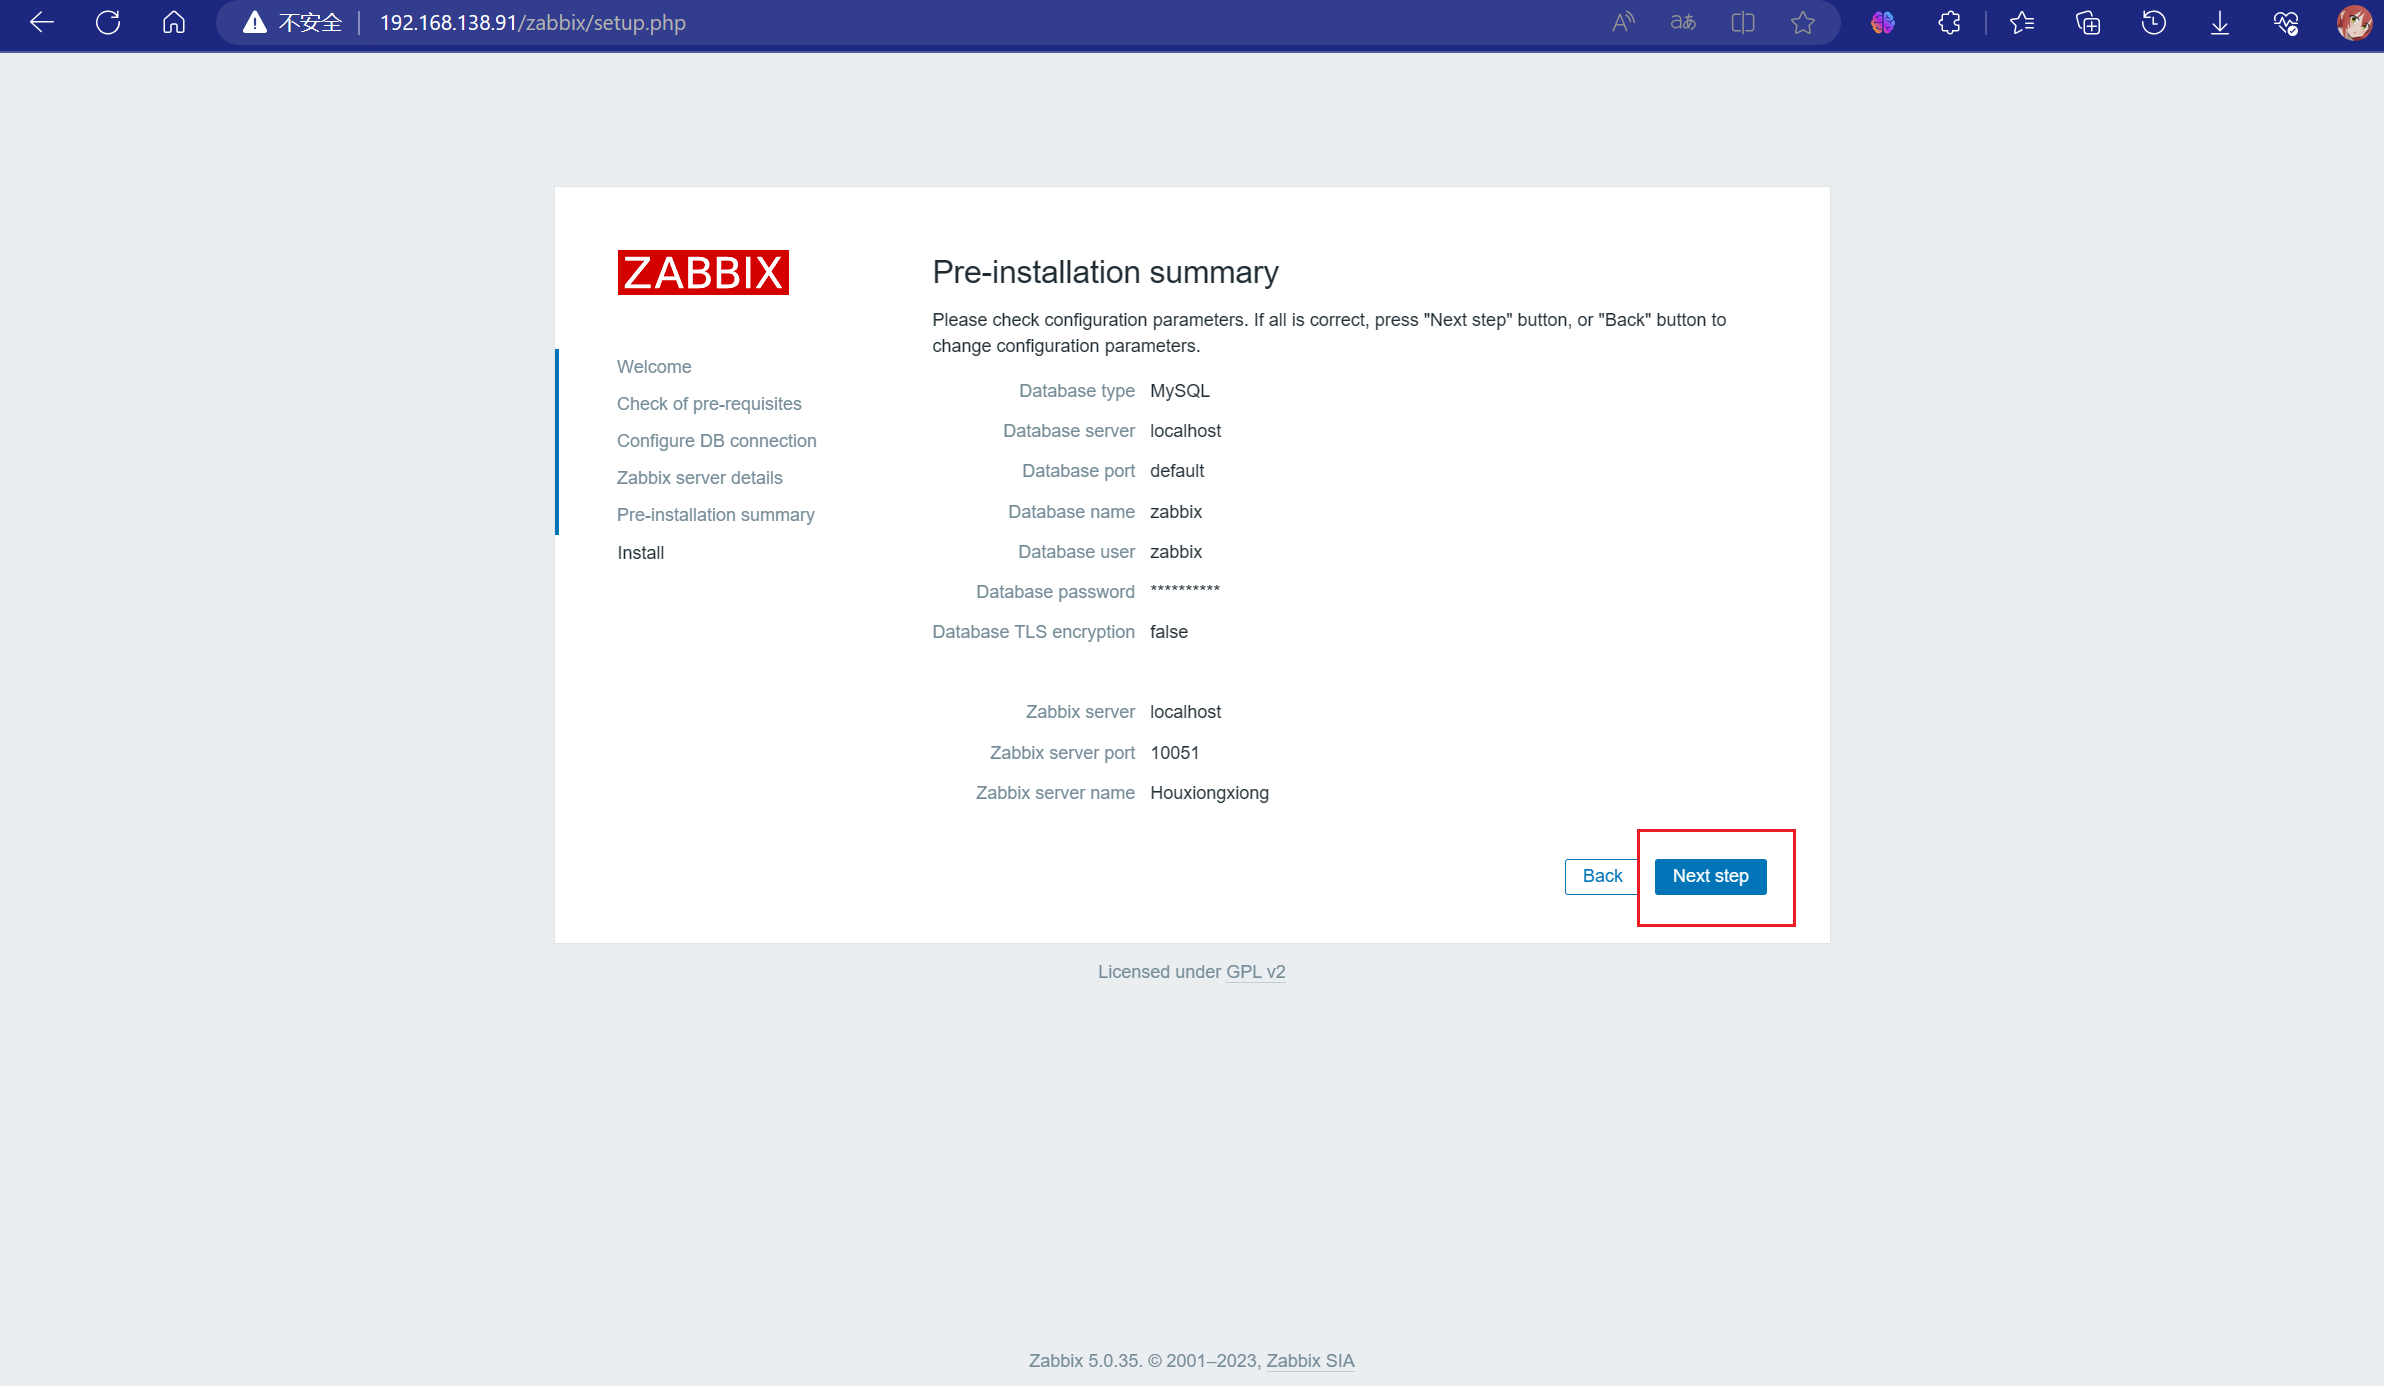
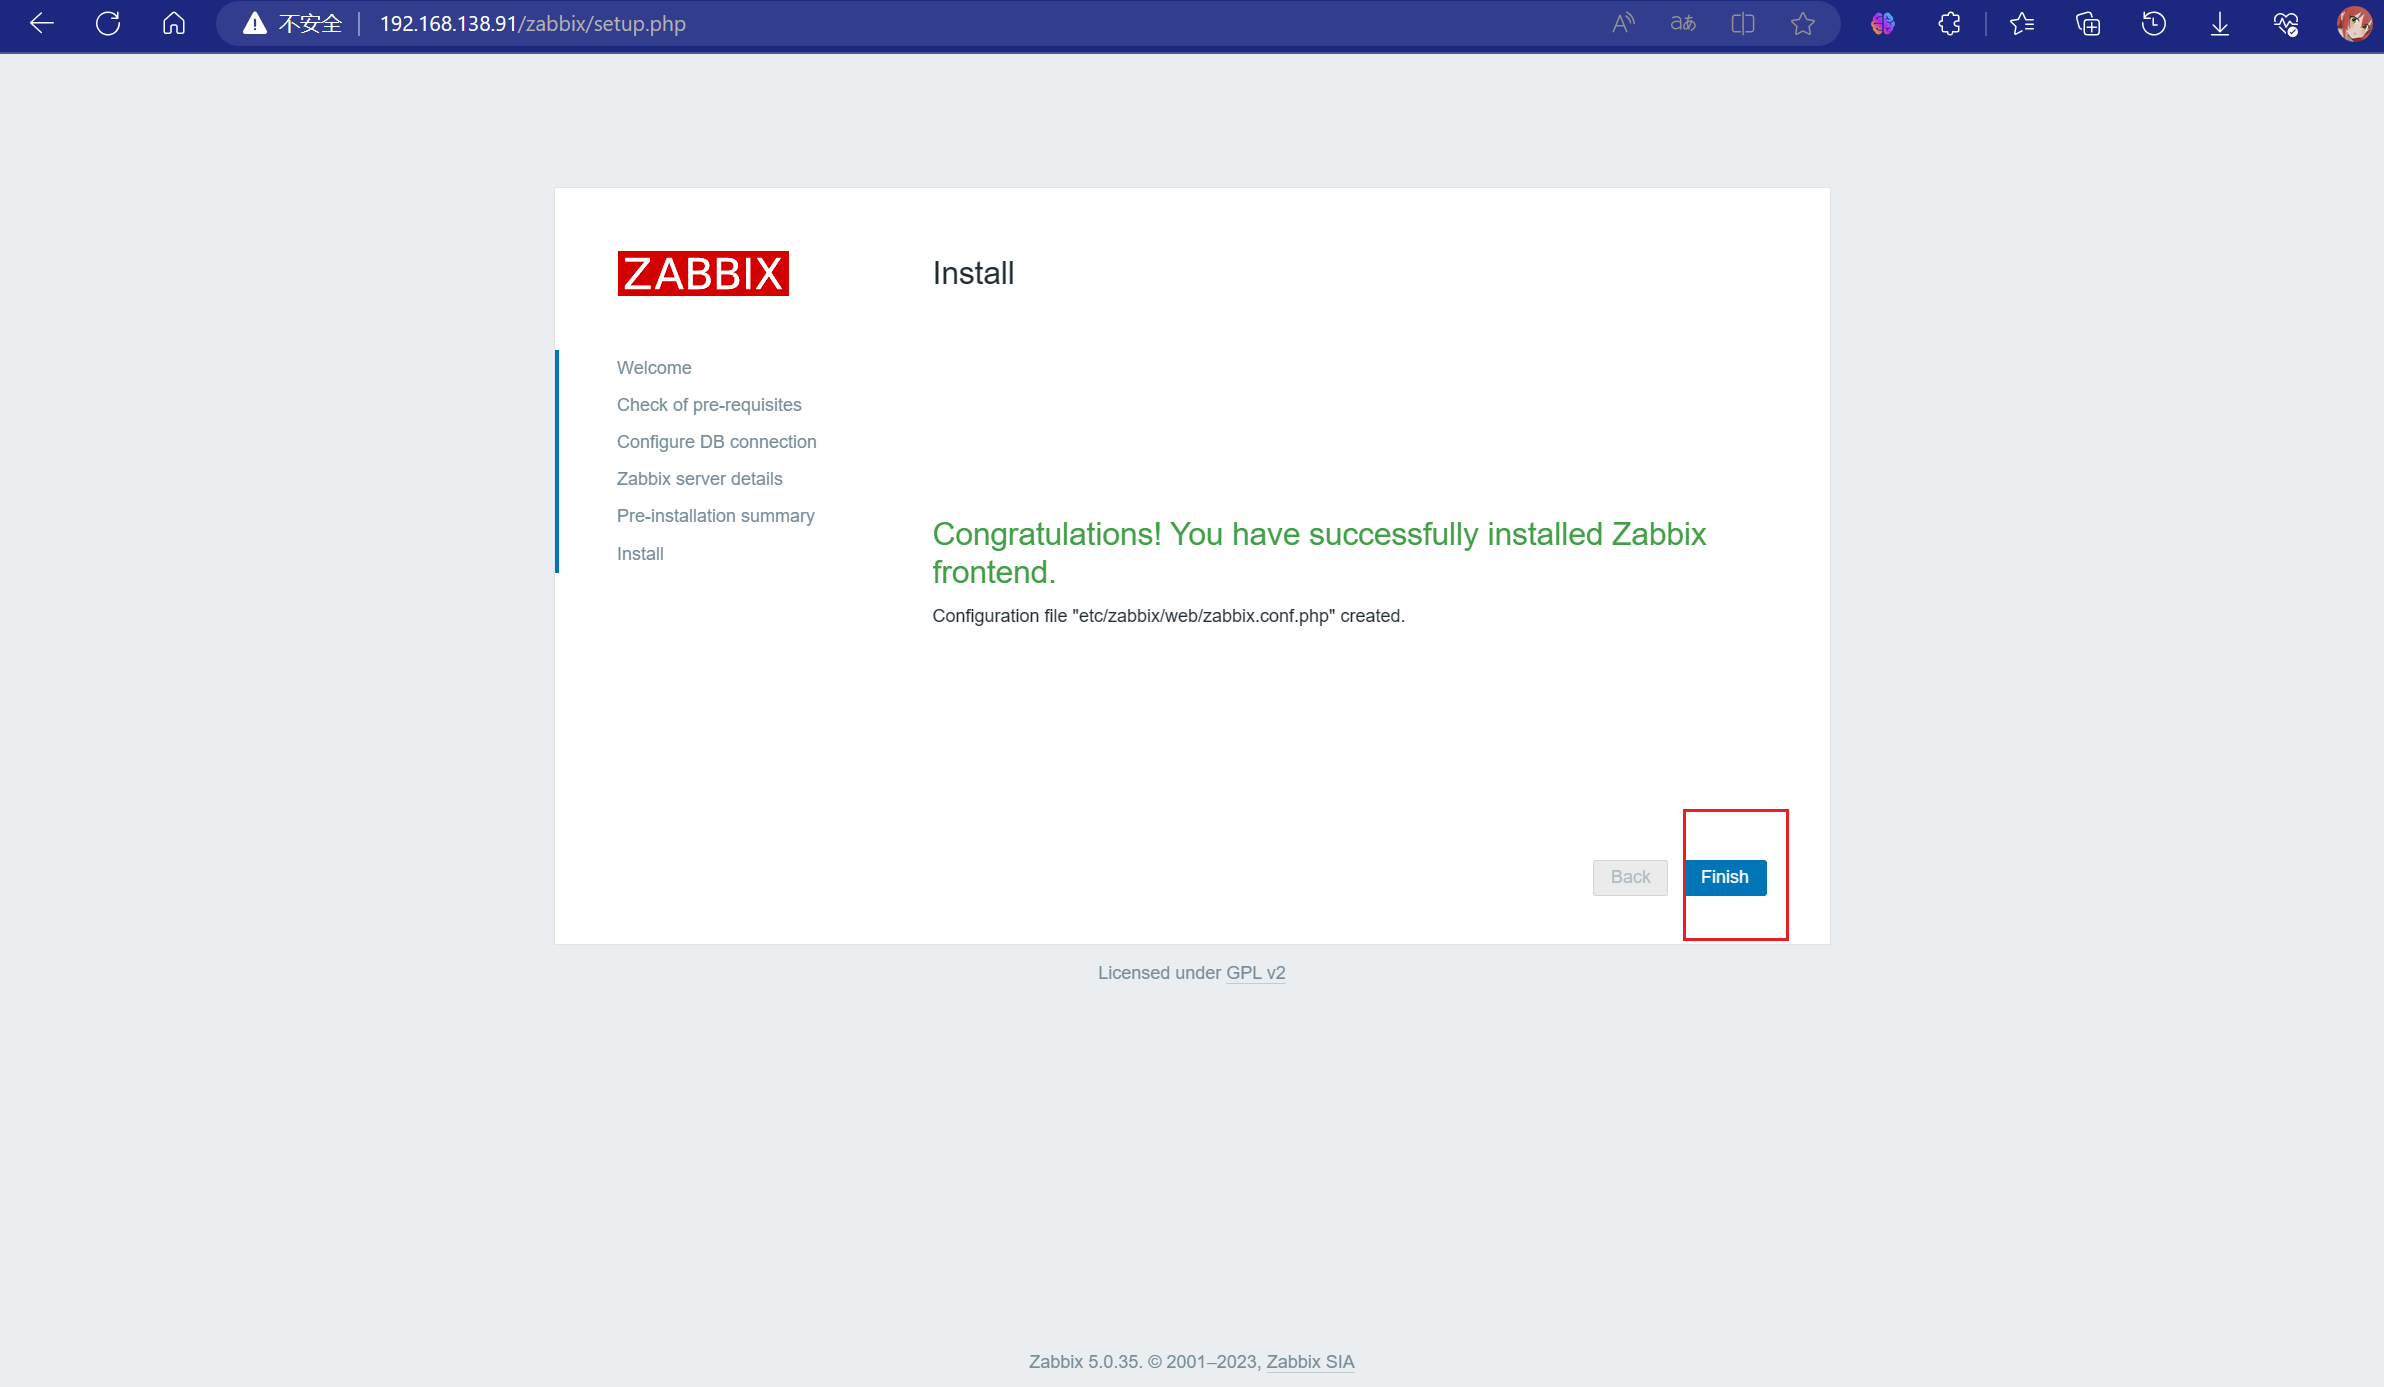
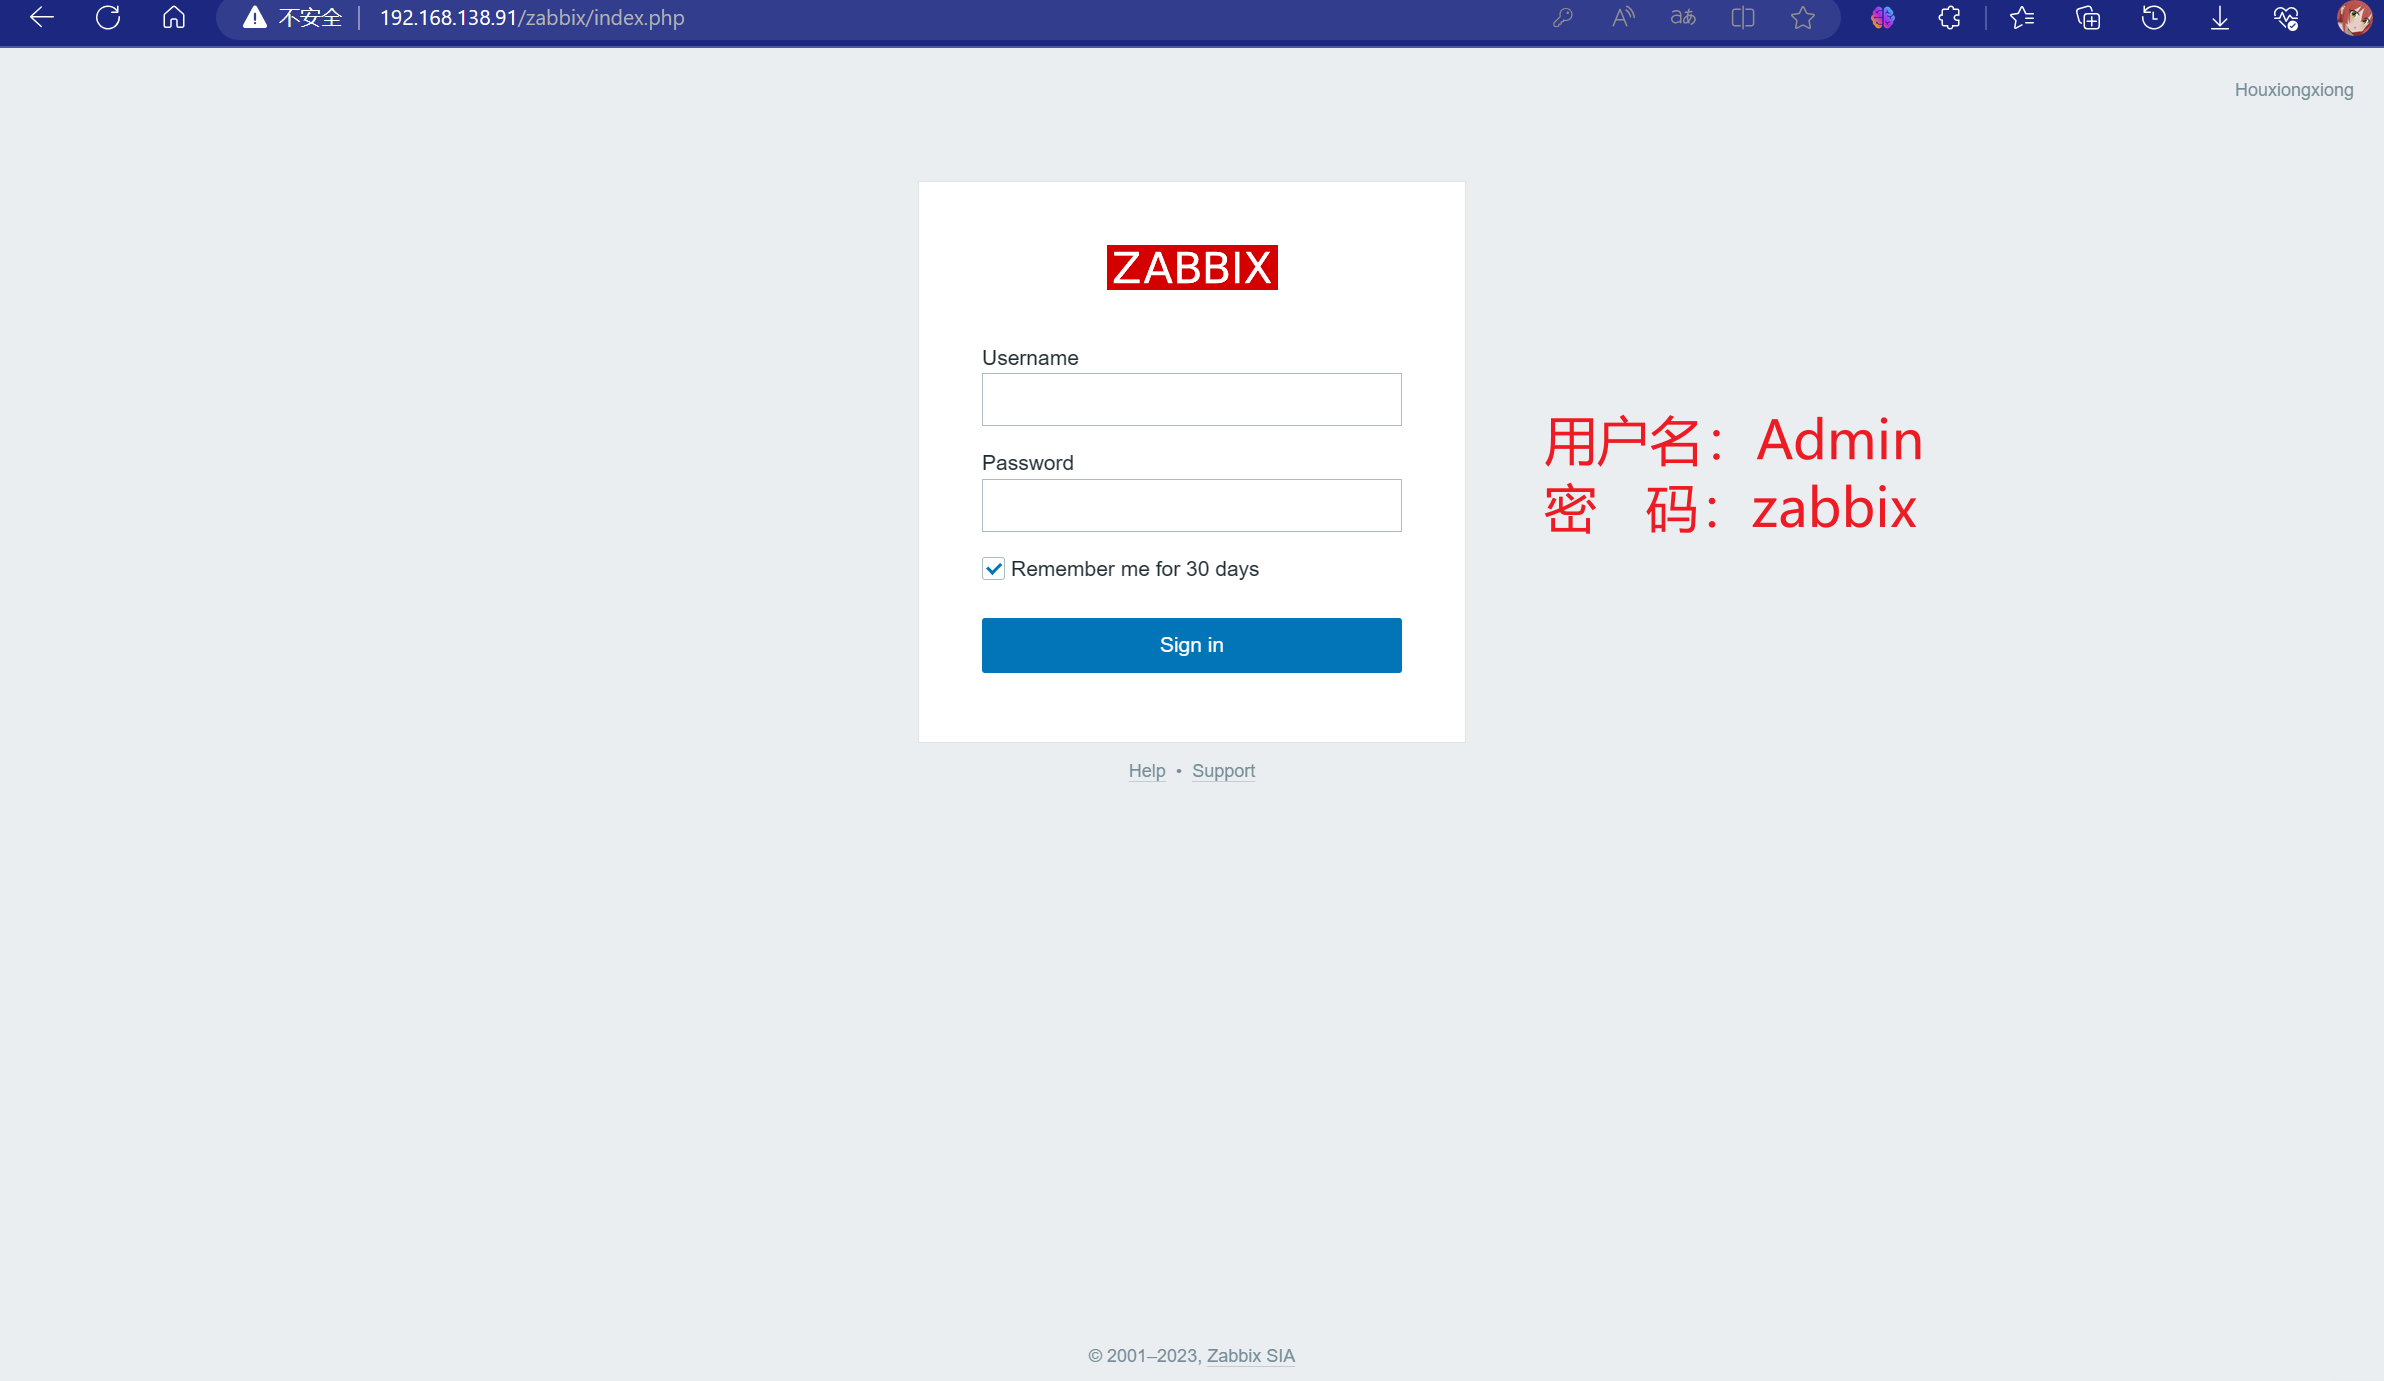
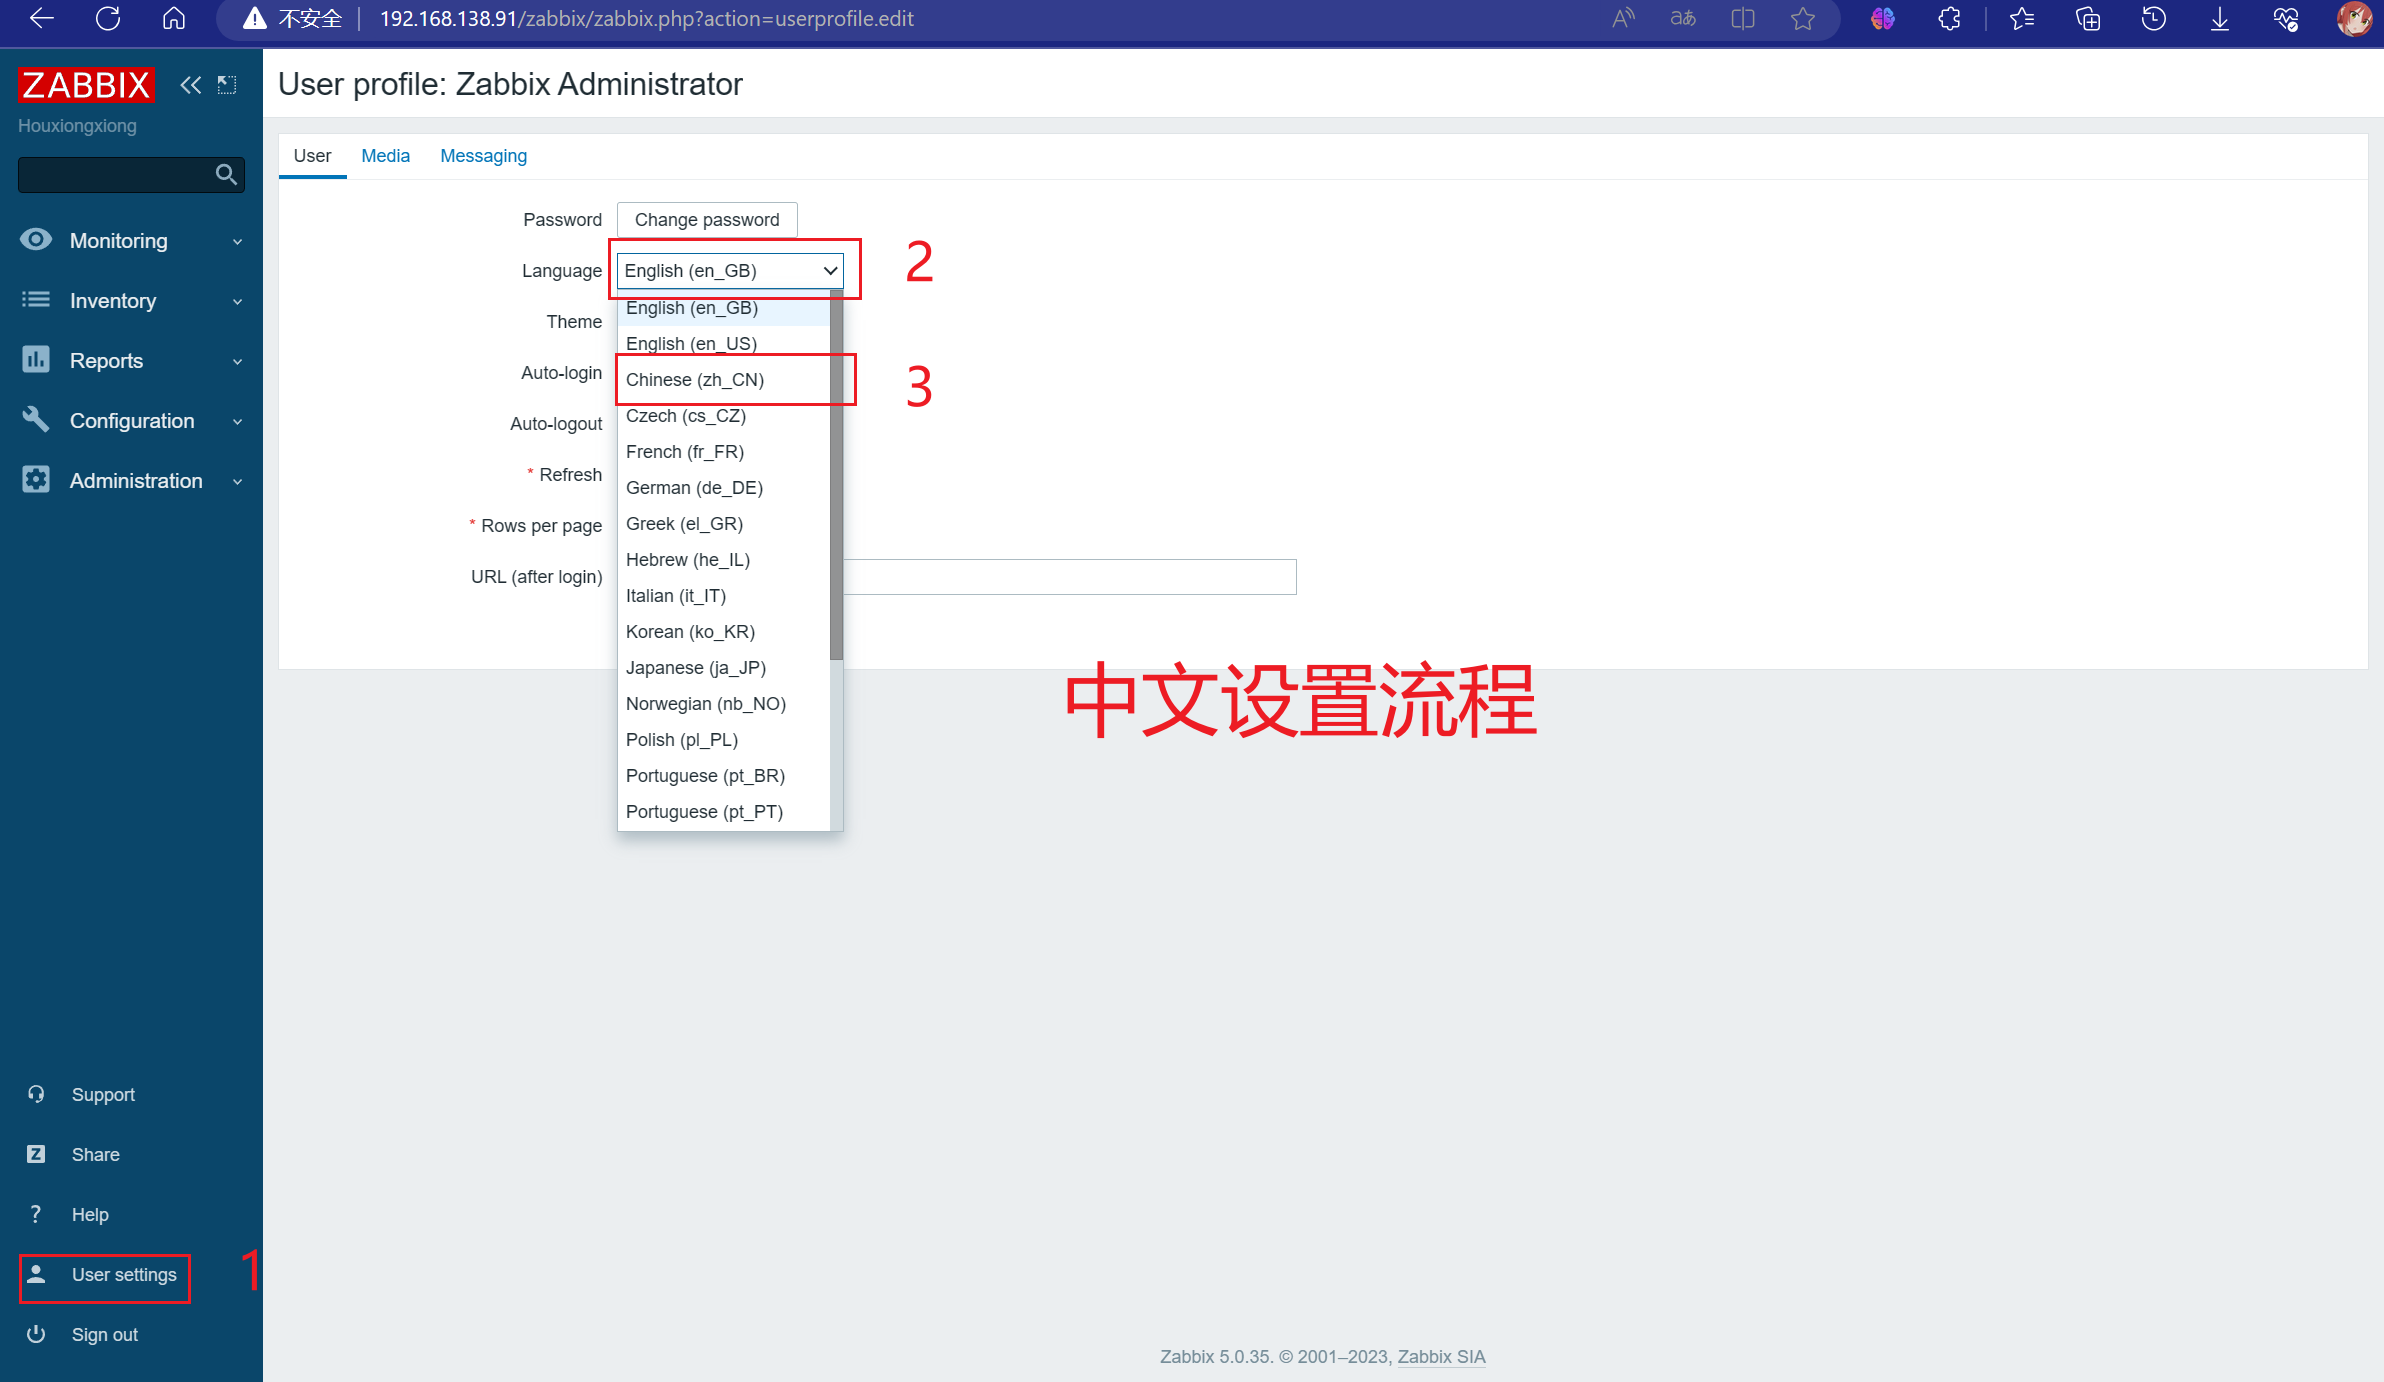
到此zabbix-server端配置结束。
三、Agent端
(一)前期工作
1.关闭防火墙
systemctl stop firewalld && systemctl disable firewalld
(二)下载agent安装包
1.下载
yum -y install wget && wget https://mirrors.tuna.tsinghua.edu.cn/zabbix/zabbix/5.0/rhel/7/x86_64/zabbix-agent-5.0.1-1.el7.x86_64.rpm --no-check-certificate
2.安装
rpm -ivh zabbix-agent-5.0.1-1.el7.x86_64.rpm
(三)编辑配置文件
这里推荐先将配置文件进行备份再进行编辑
在vim中清空文件所有内容的命令是 %d
yum -y install vim && cd /etc/zabbix/ && cp zabbix_agentd.conf zabbix_agentd.conf.bak && vim zabbix_agentd.conf
清空后添加下面的内容,请按需求进行修改。
PidFile=/var/run/zabbix/zabbix_agentd.pid
LogFile=/var/log/zabbix/zabbix_agentd.log
LogFileSize=0
DenyKey=system.run[*]
Server=192.168.138.91
ListenPort=10050
Hostname=client
Include=/etc/zabbix/zabbix_agentd.d/*.conf
(四)启动agent端
systemctl start zabbix-agent && systemctl disable zabbix-agent
(五)添加agent端
1.登陆server端
访问地址:http://192.168.138.91/zabbix //自行修改IP
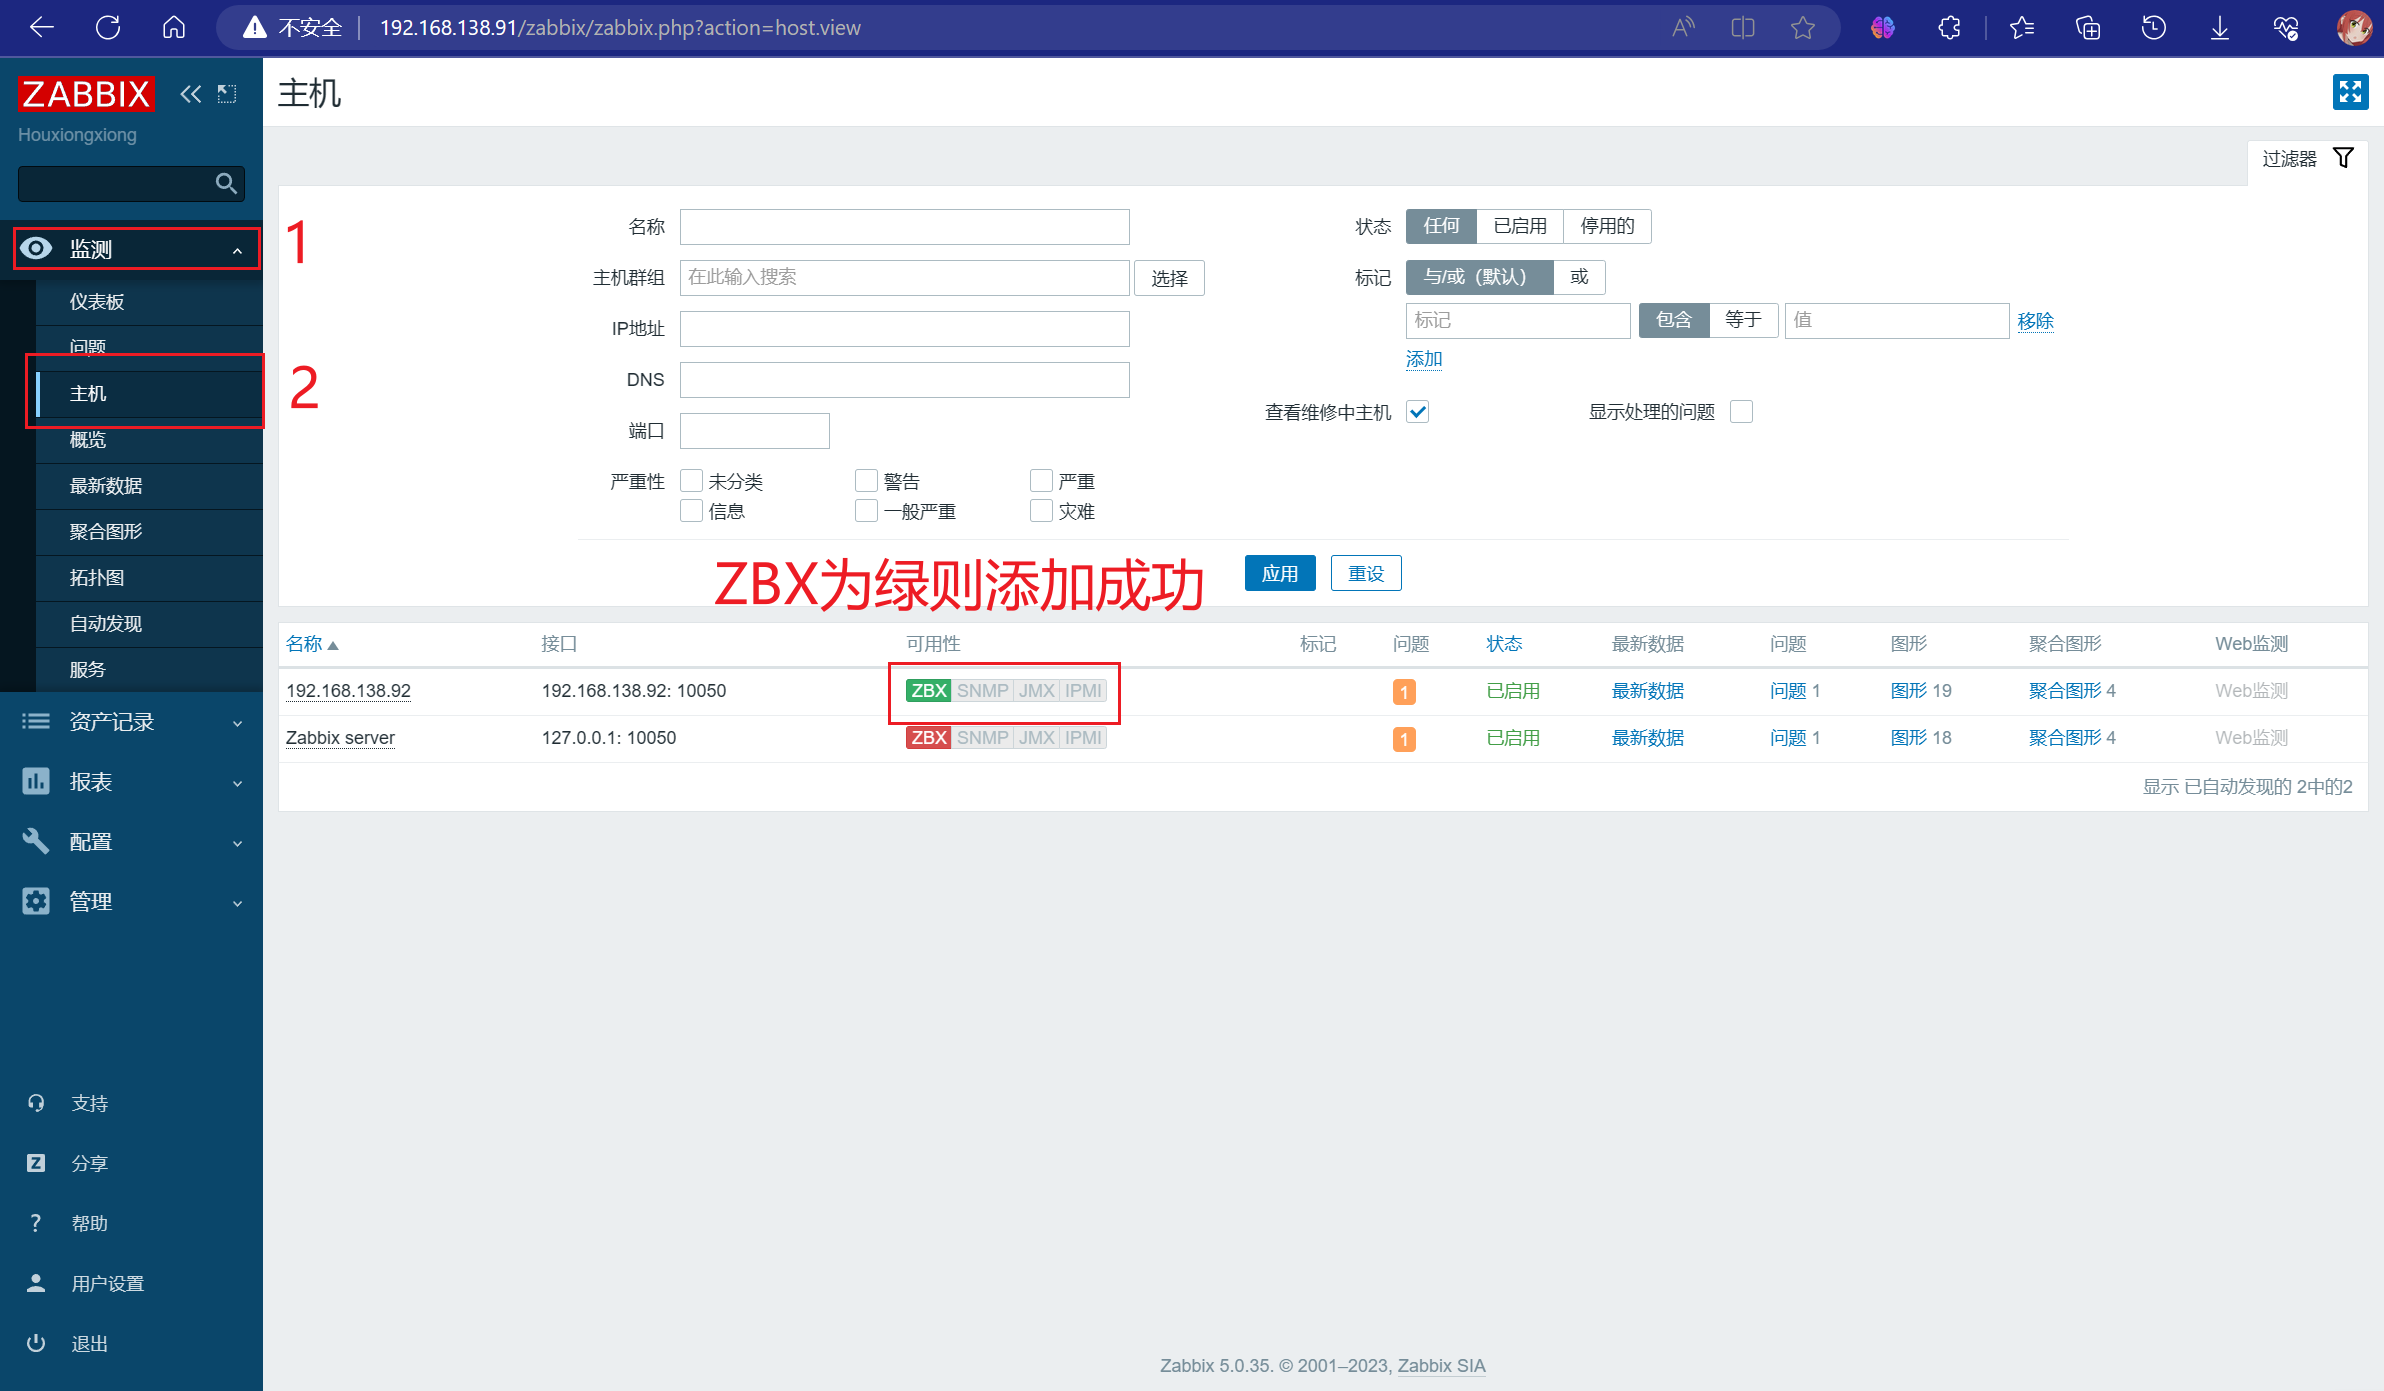
2.添加到server
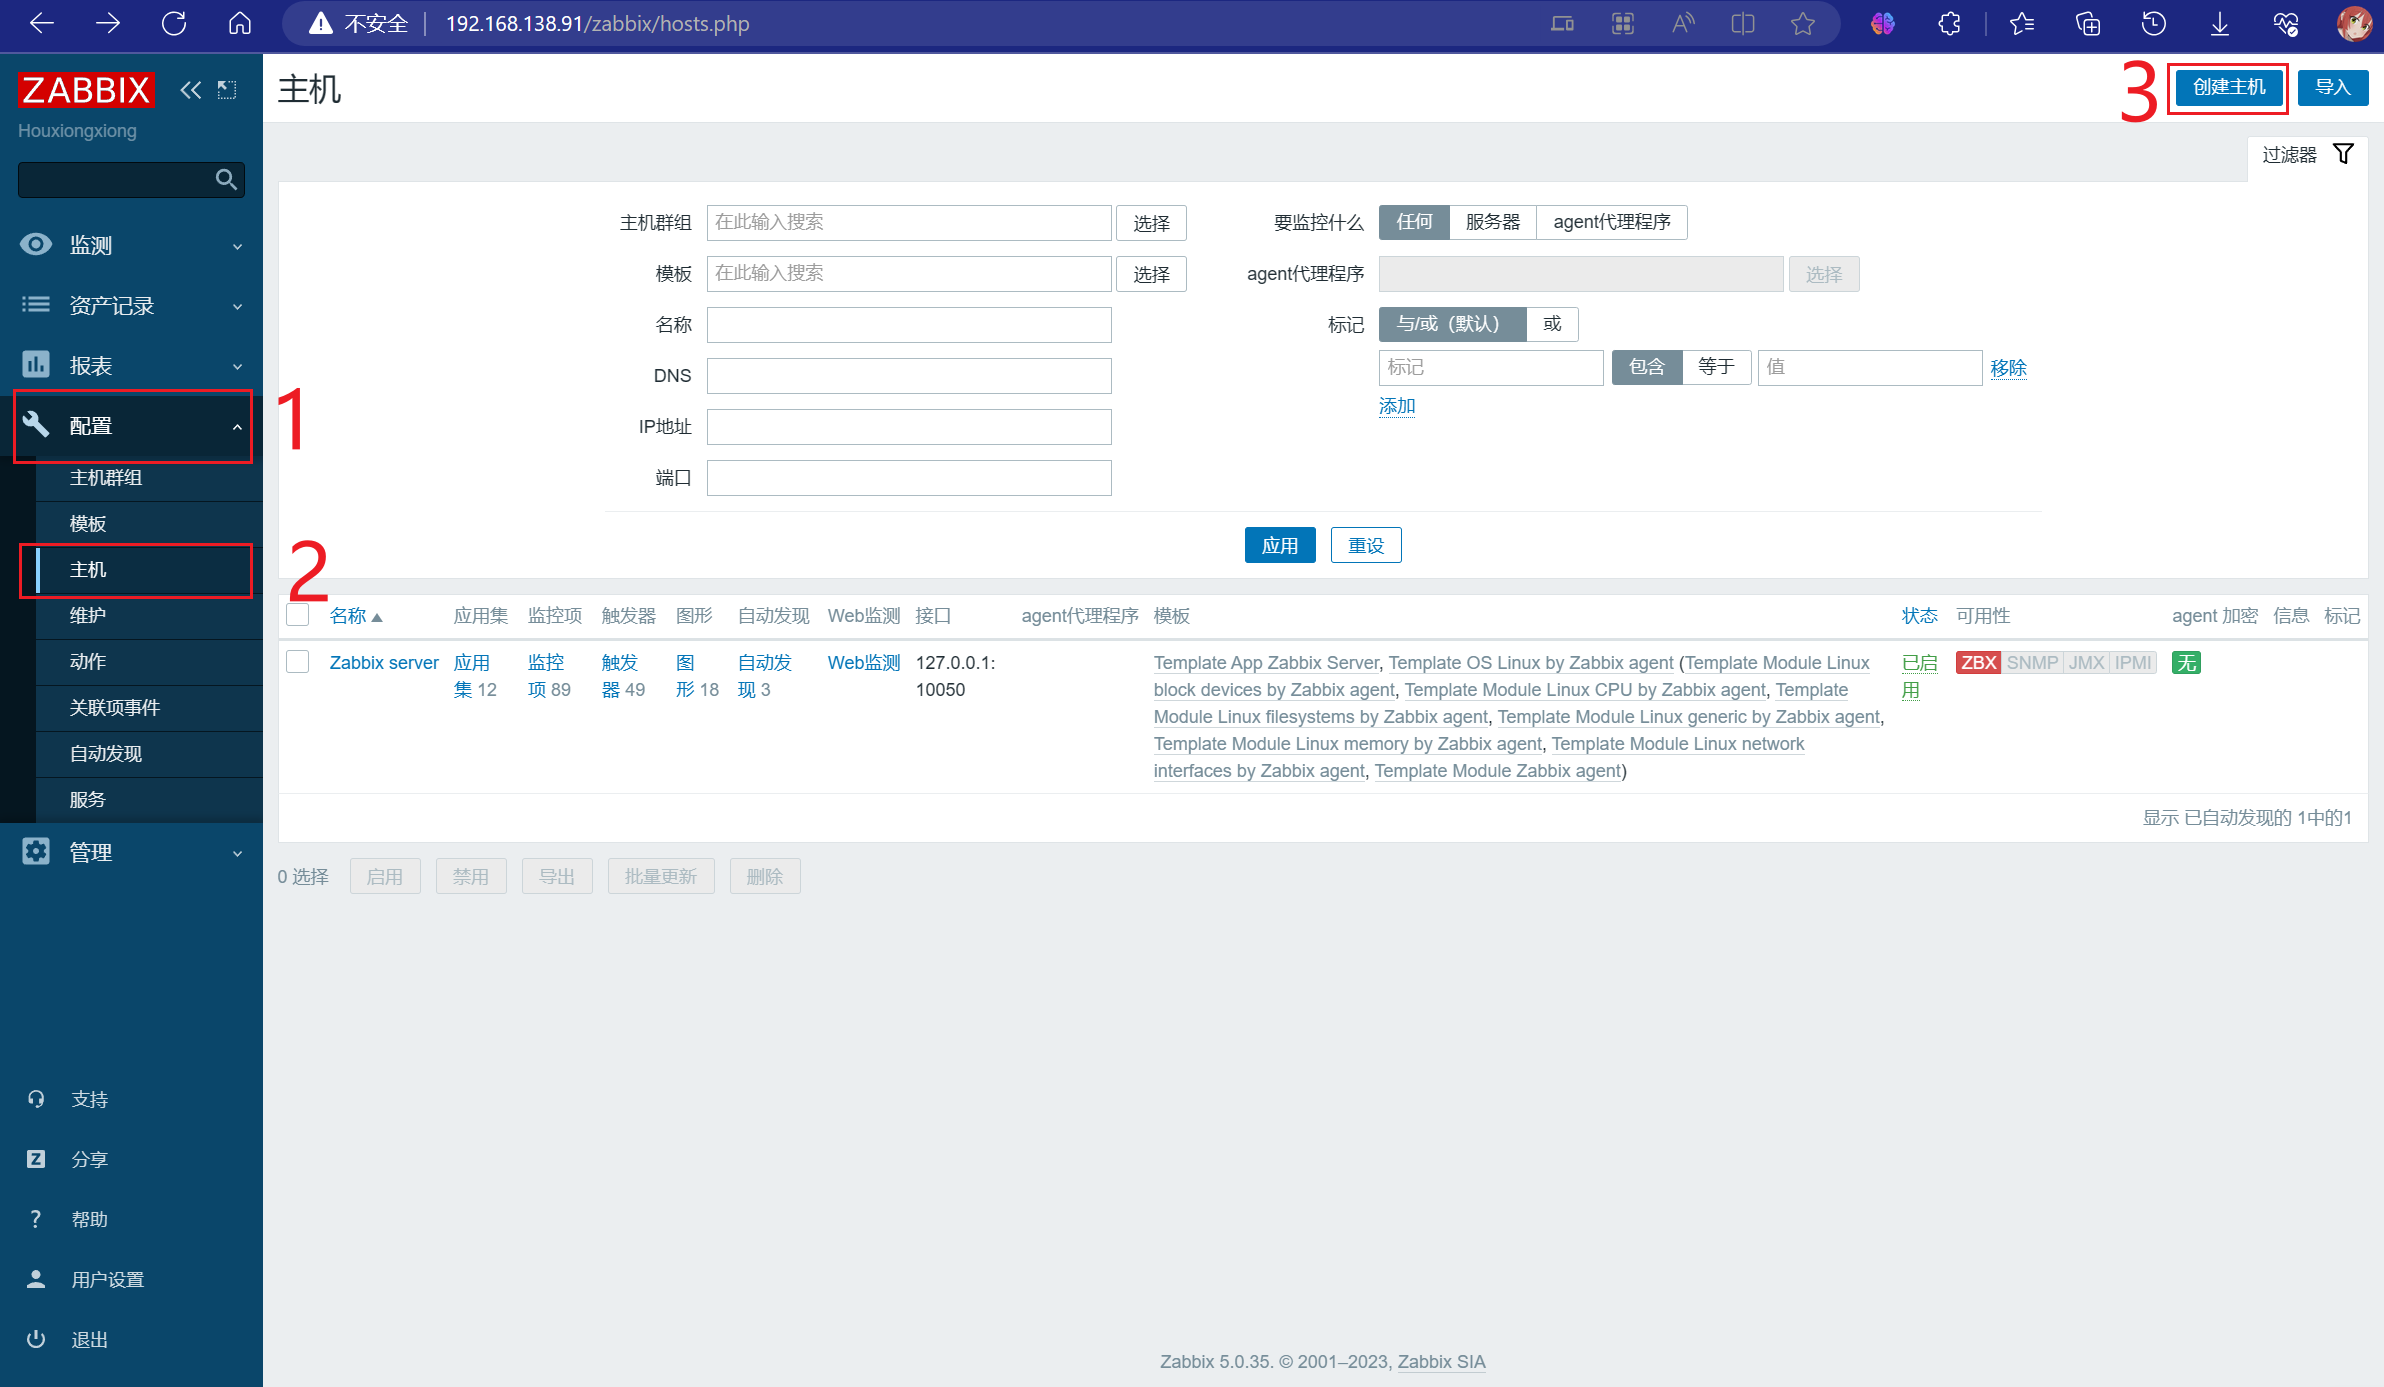
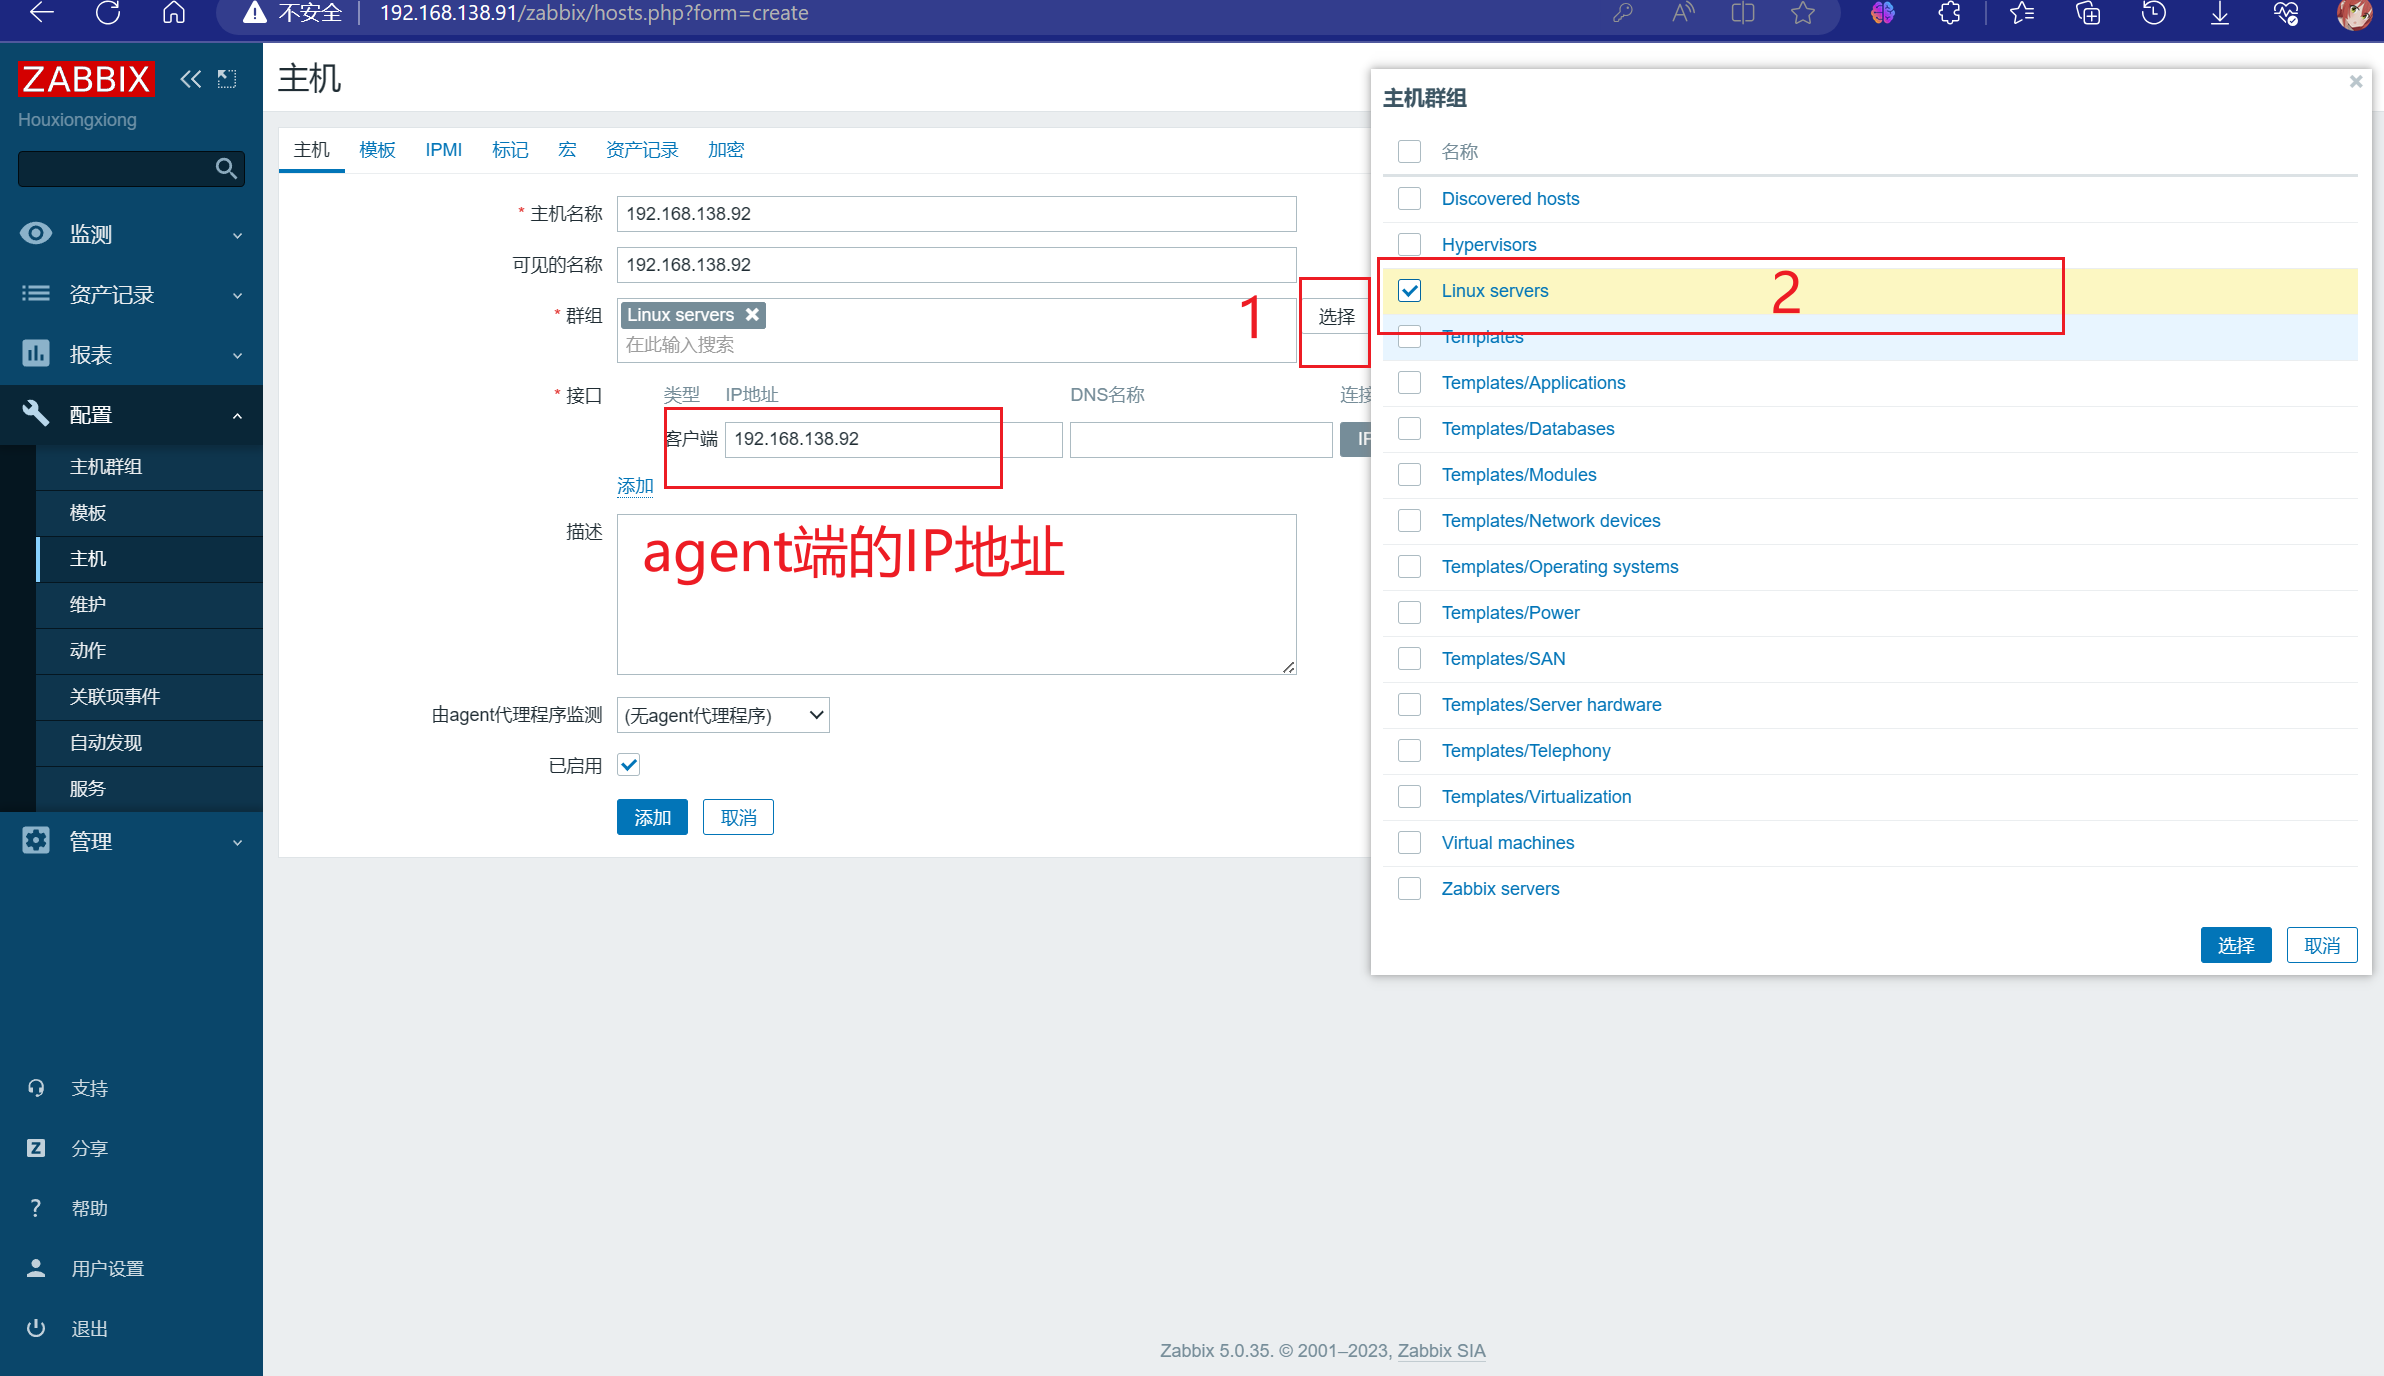
这里要稍稍等会
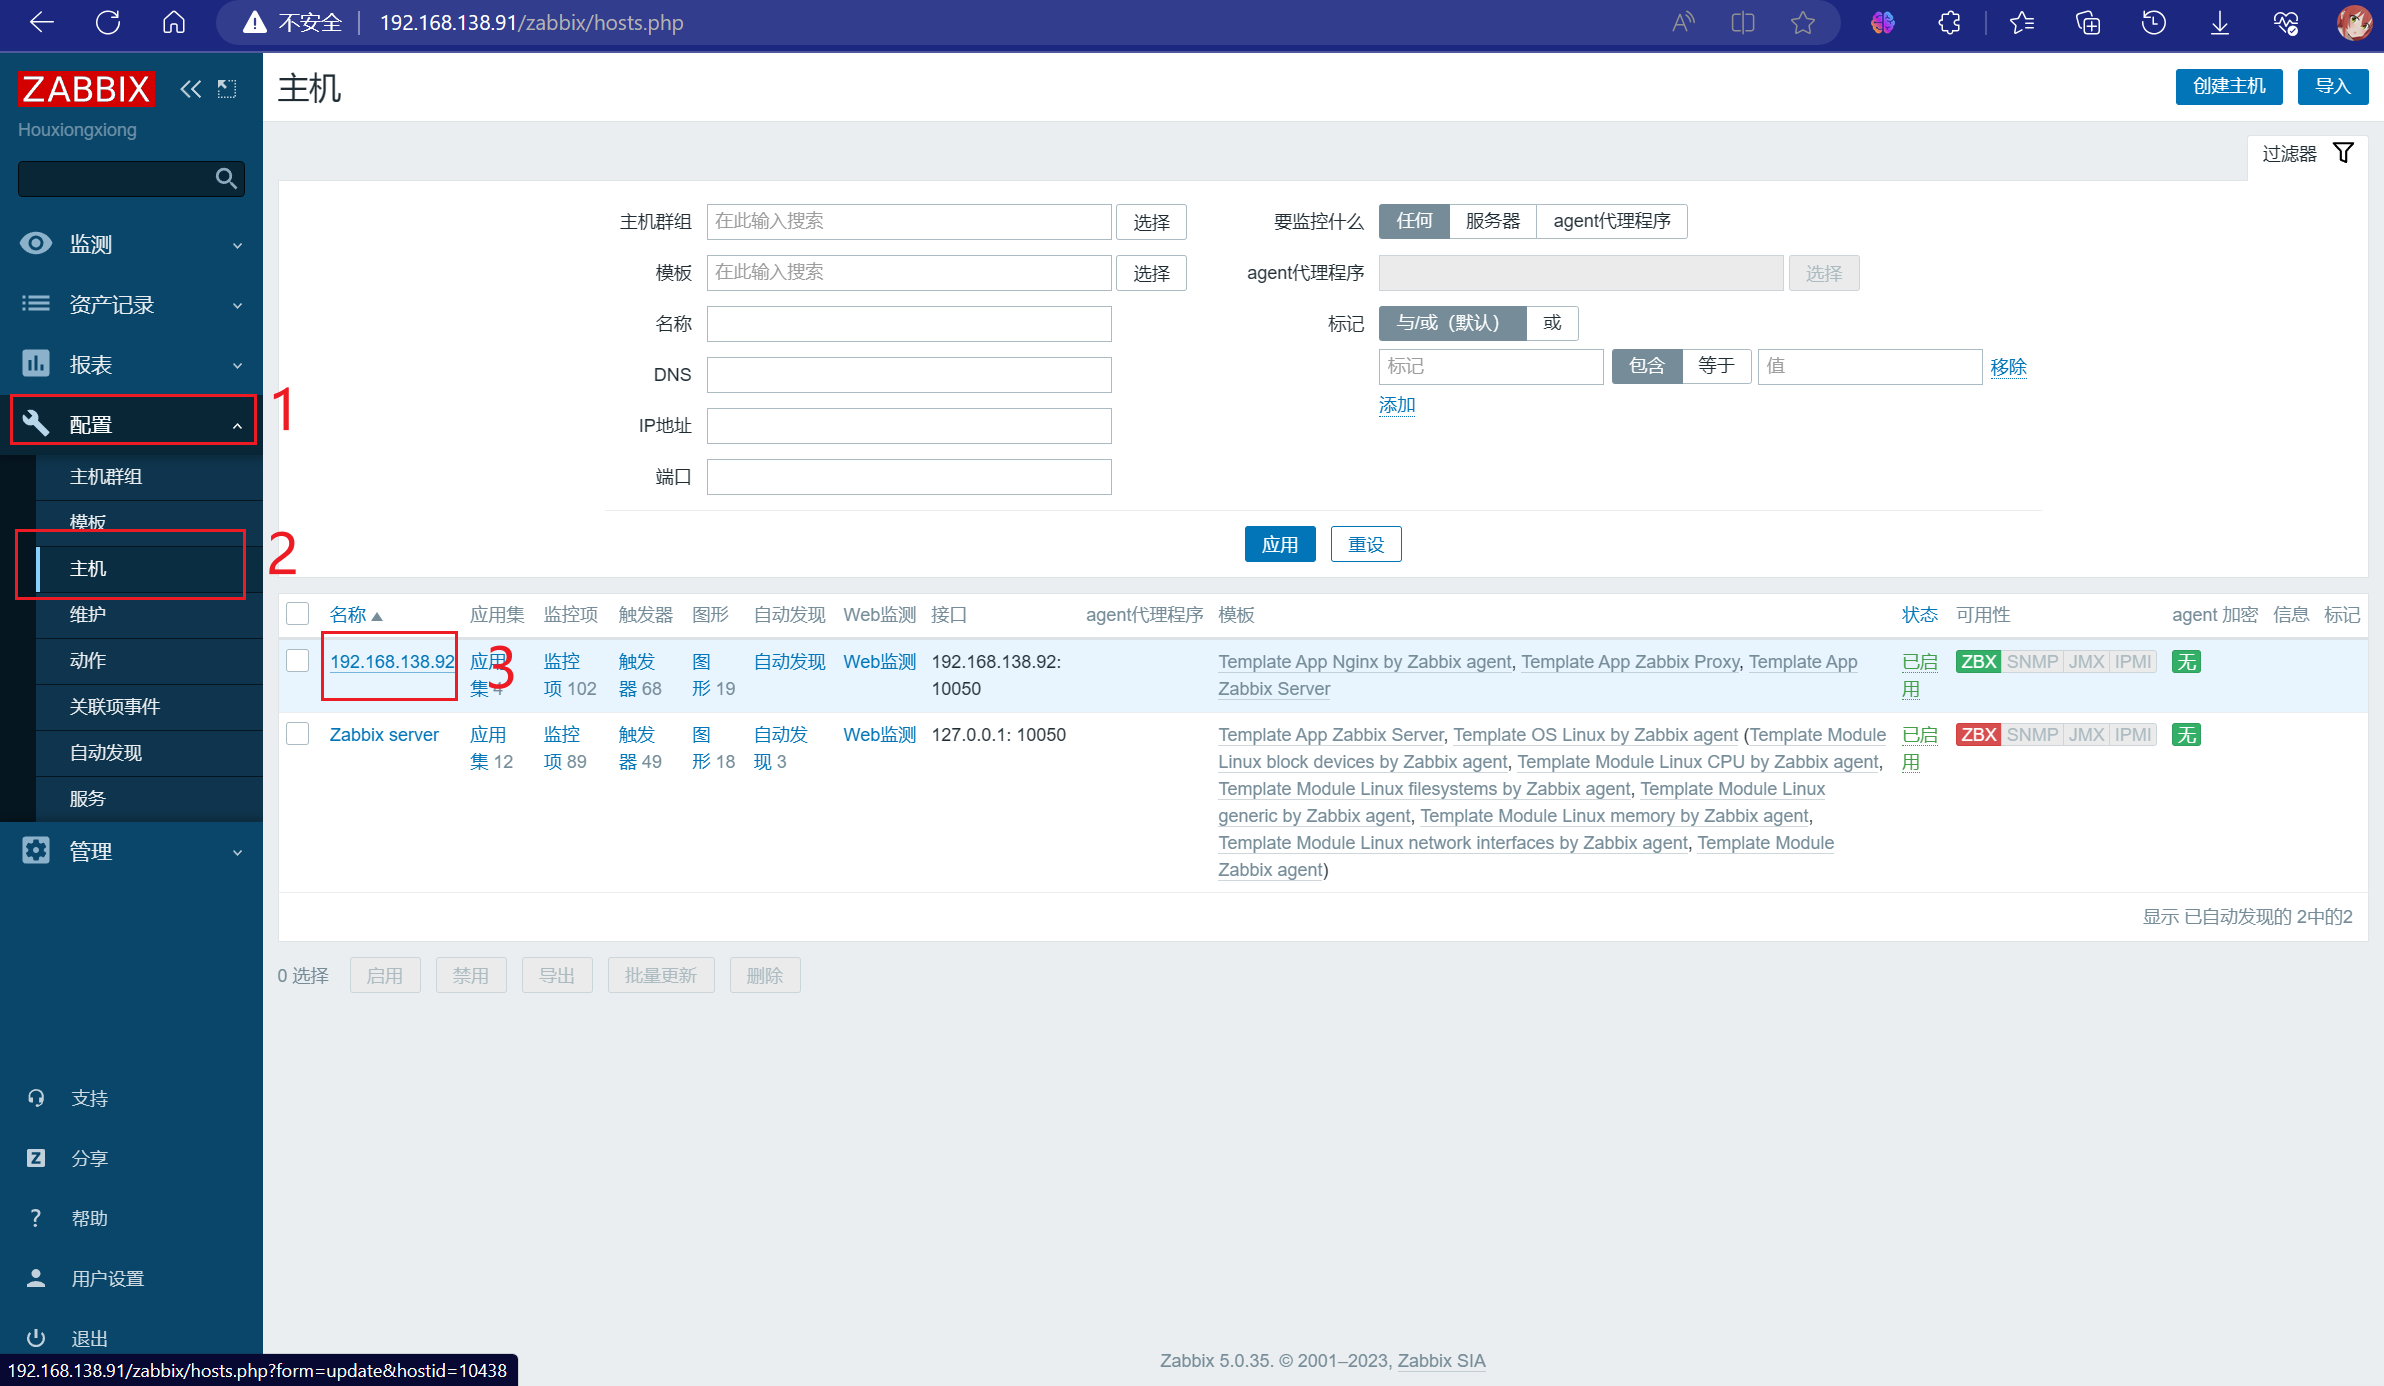
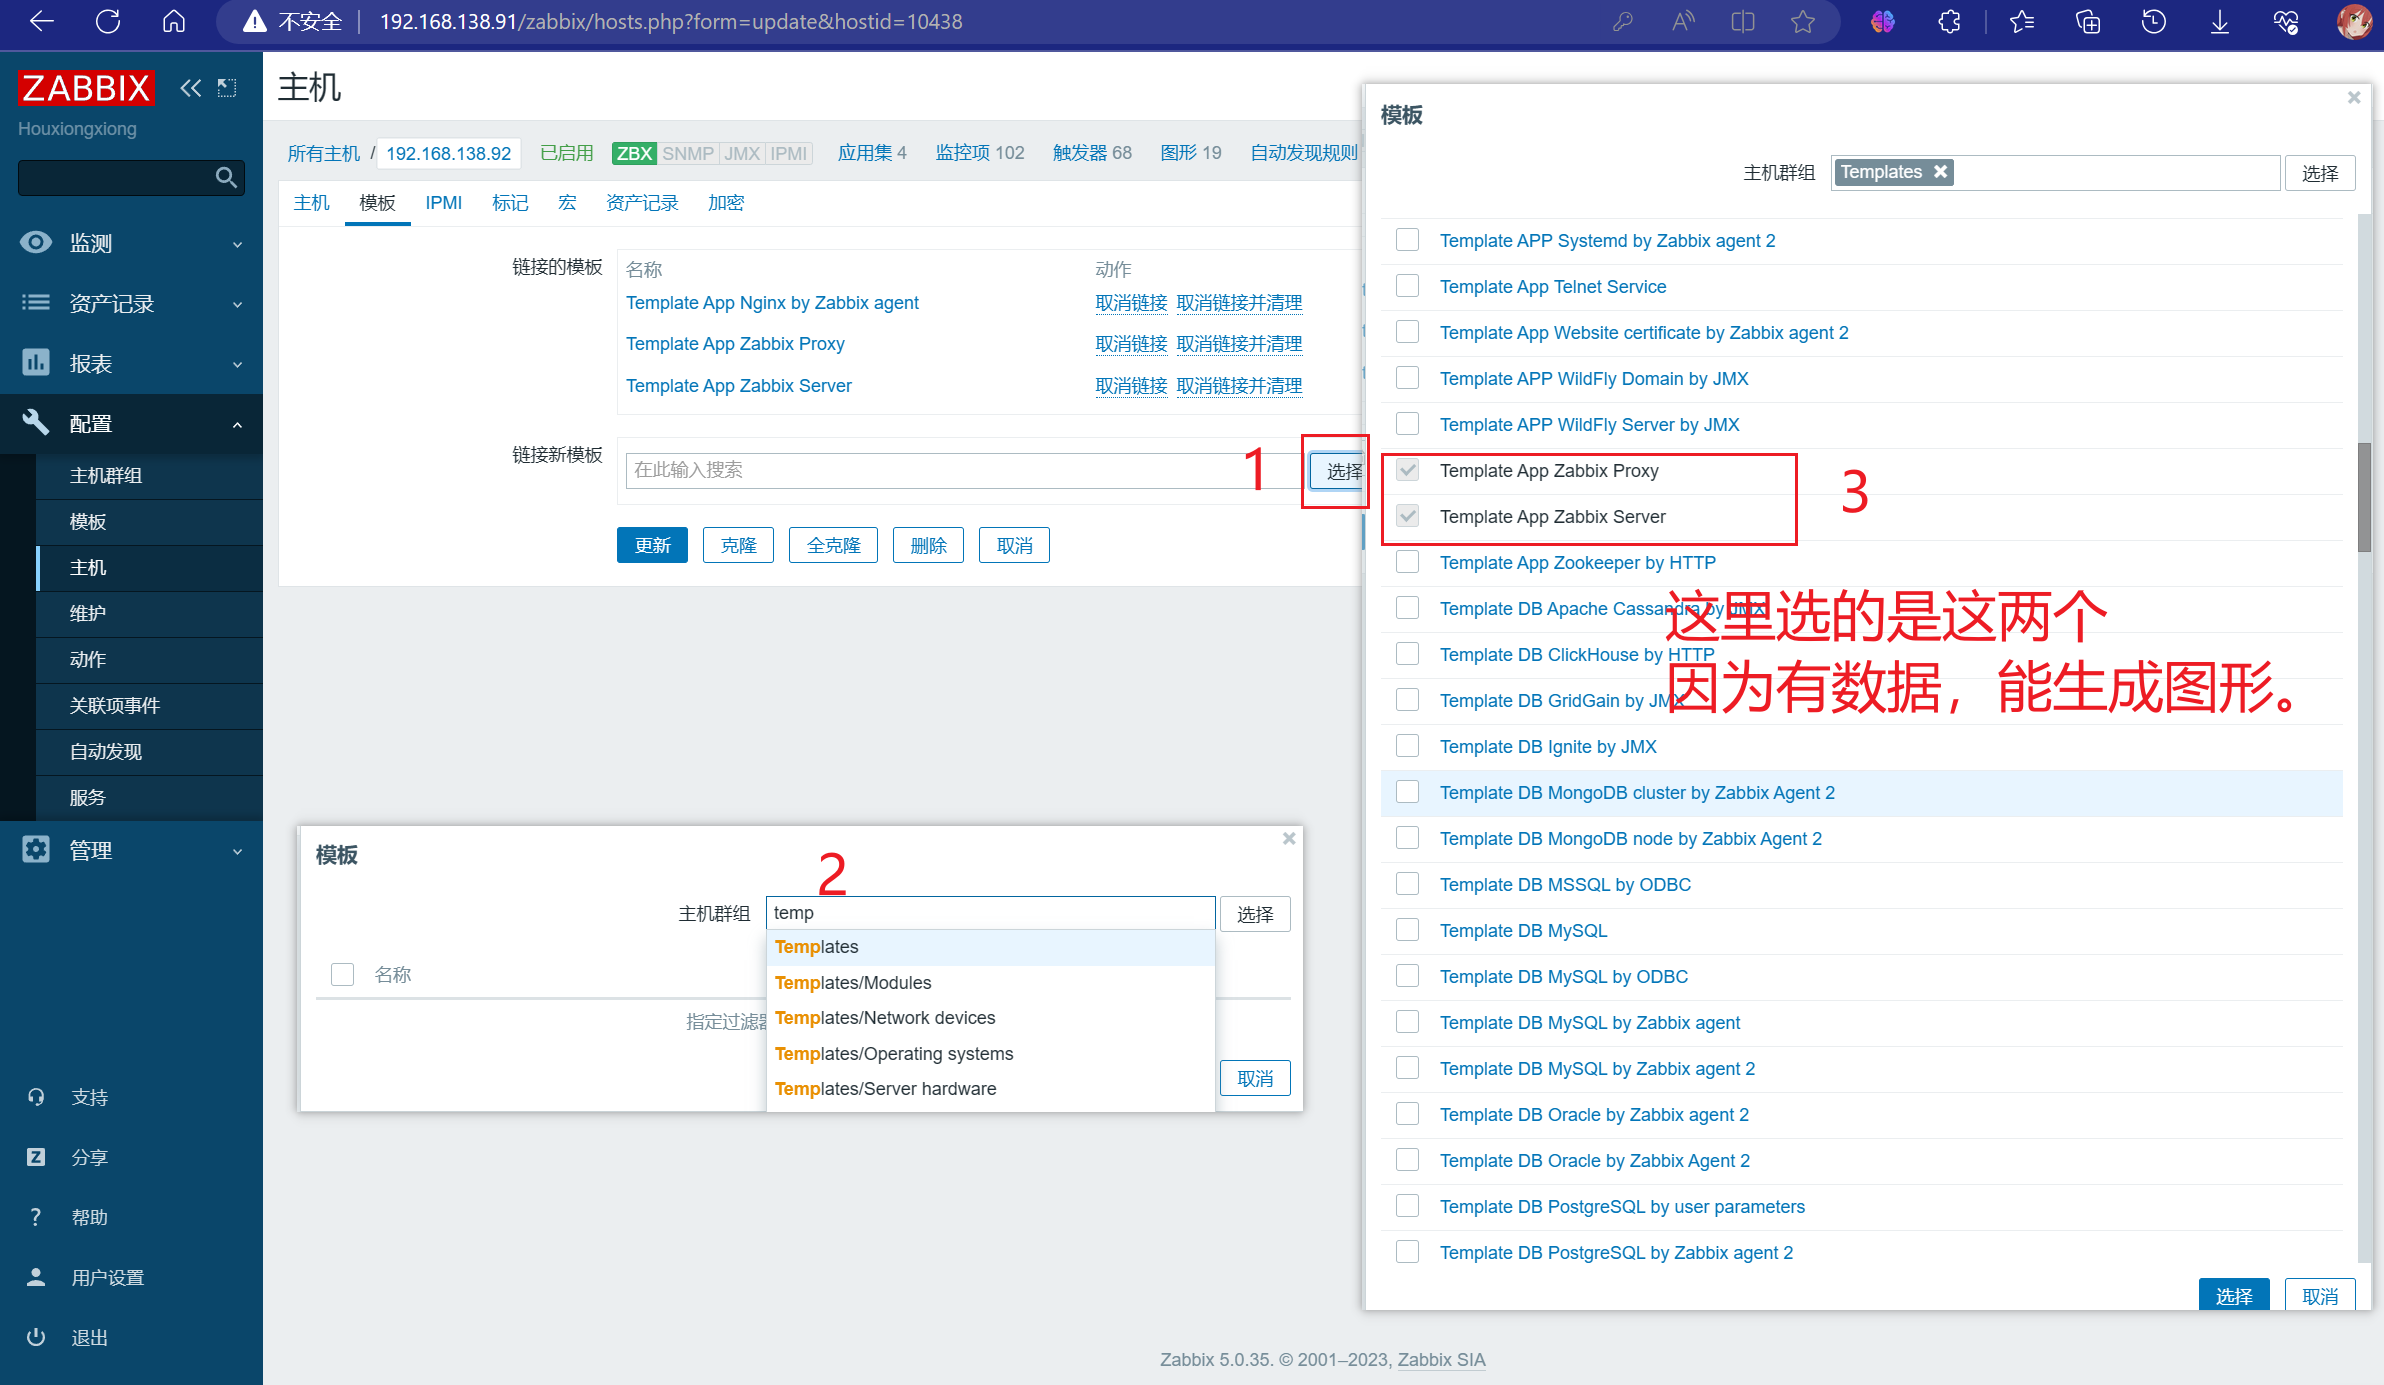
3.添加监控模板
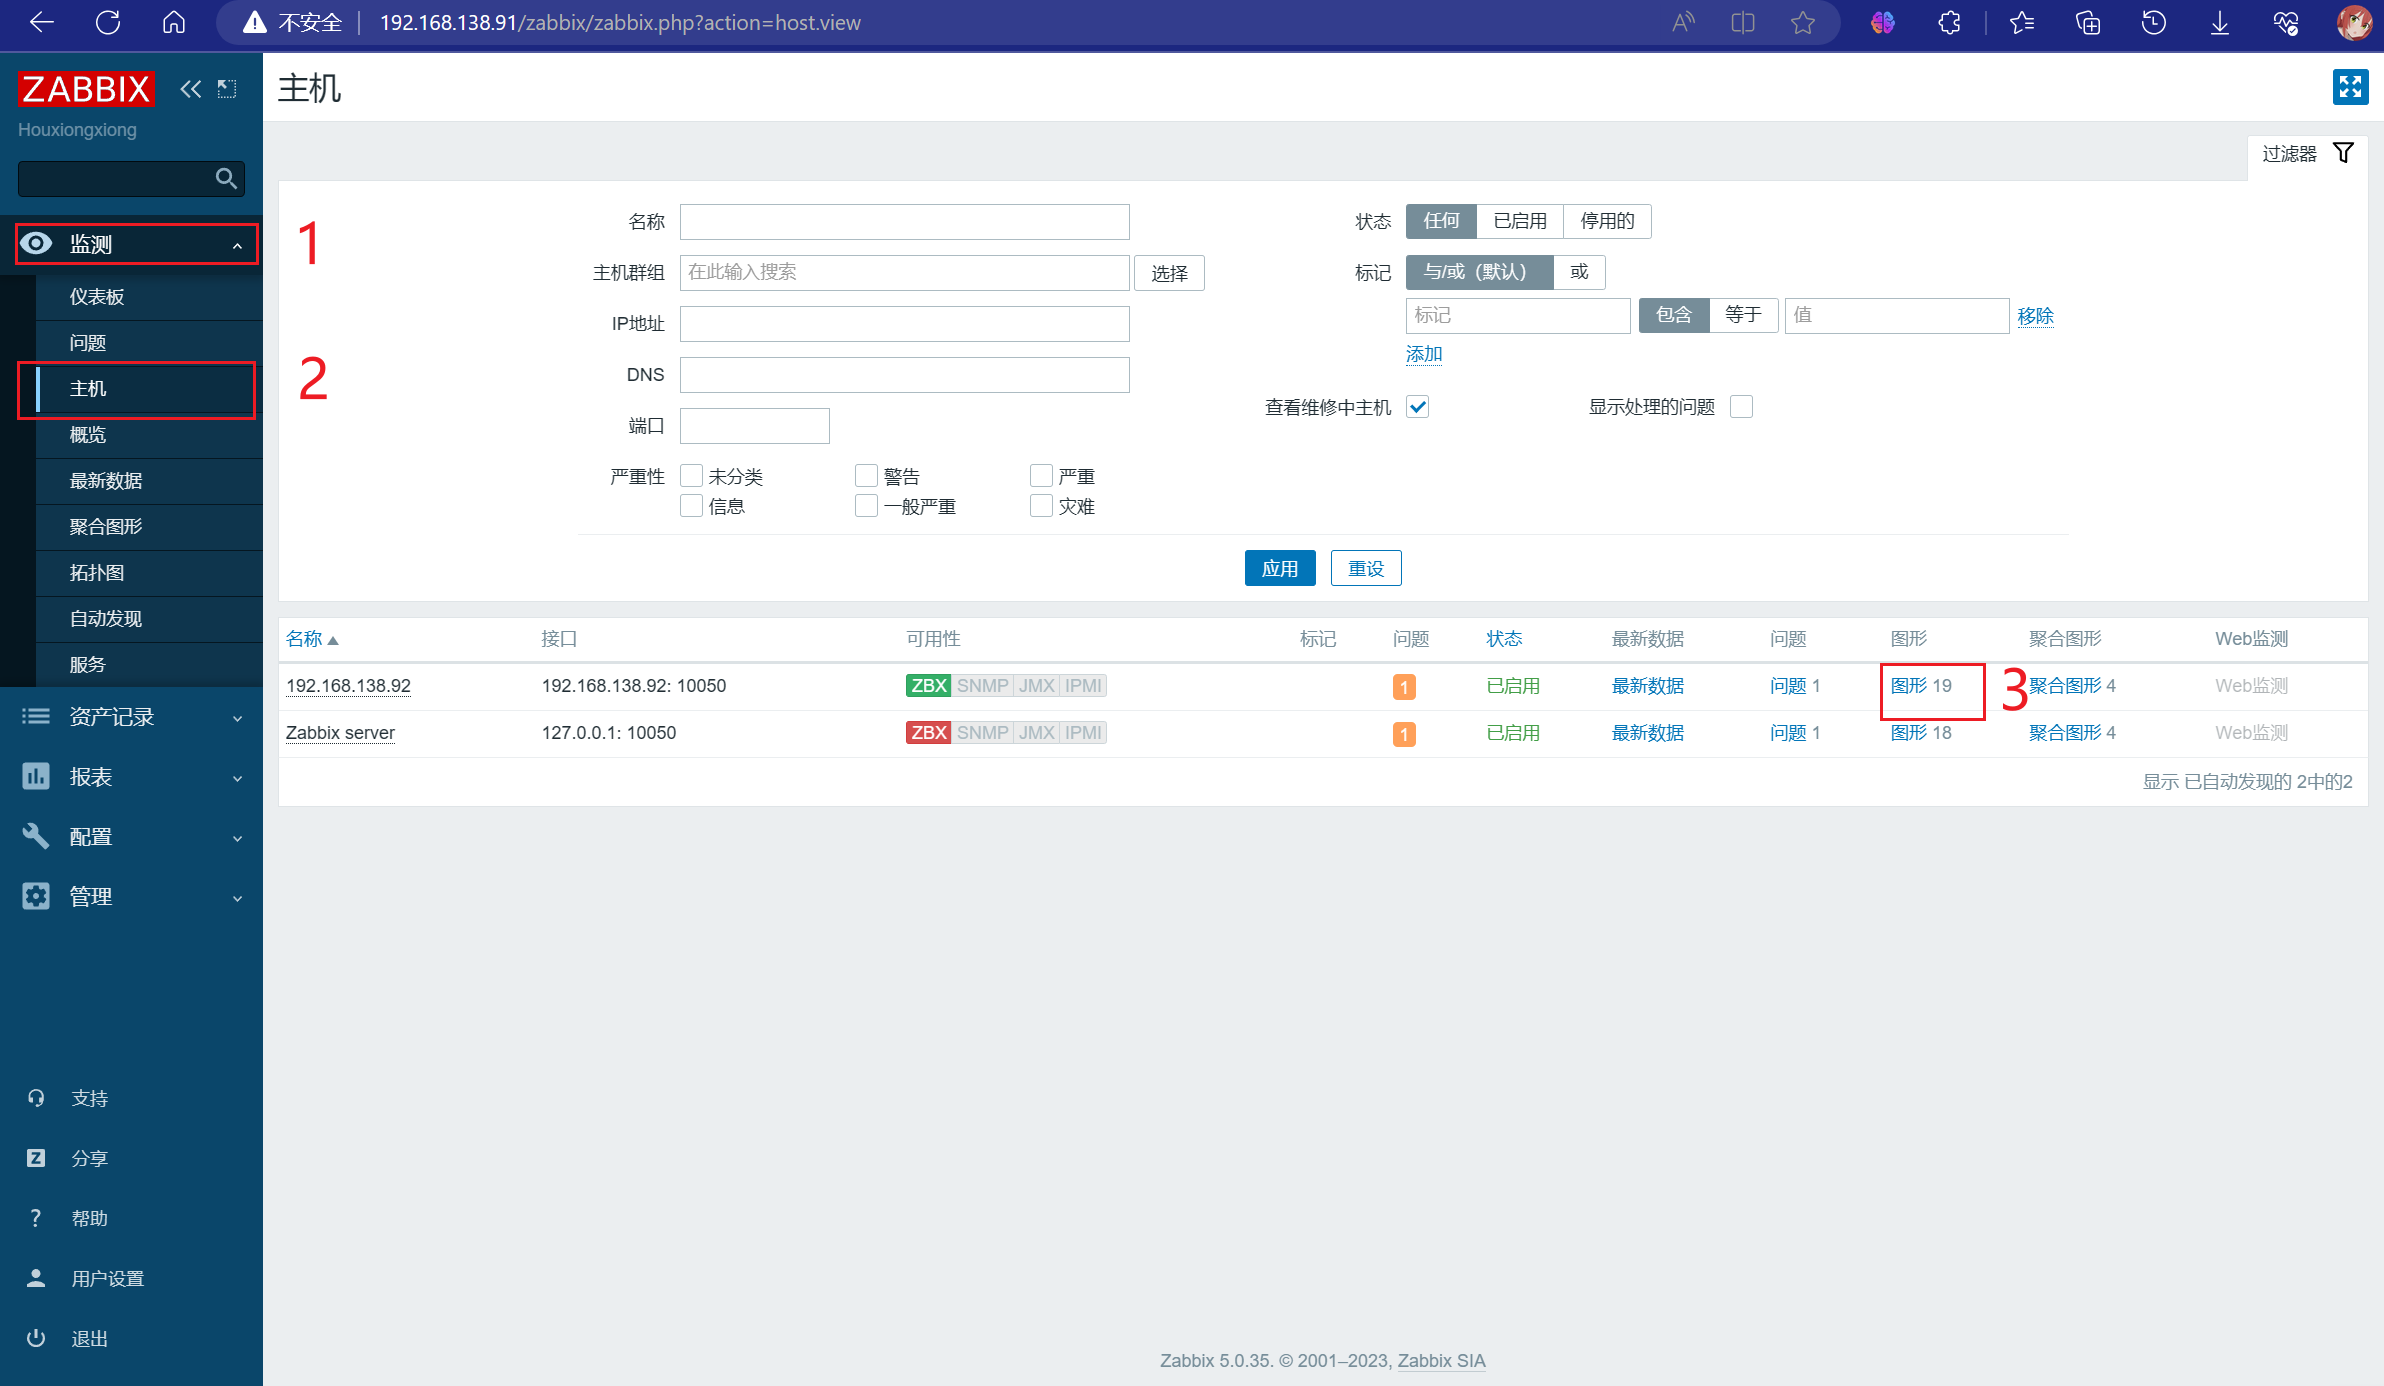
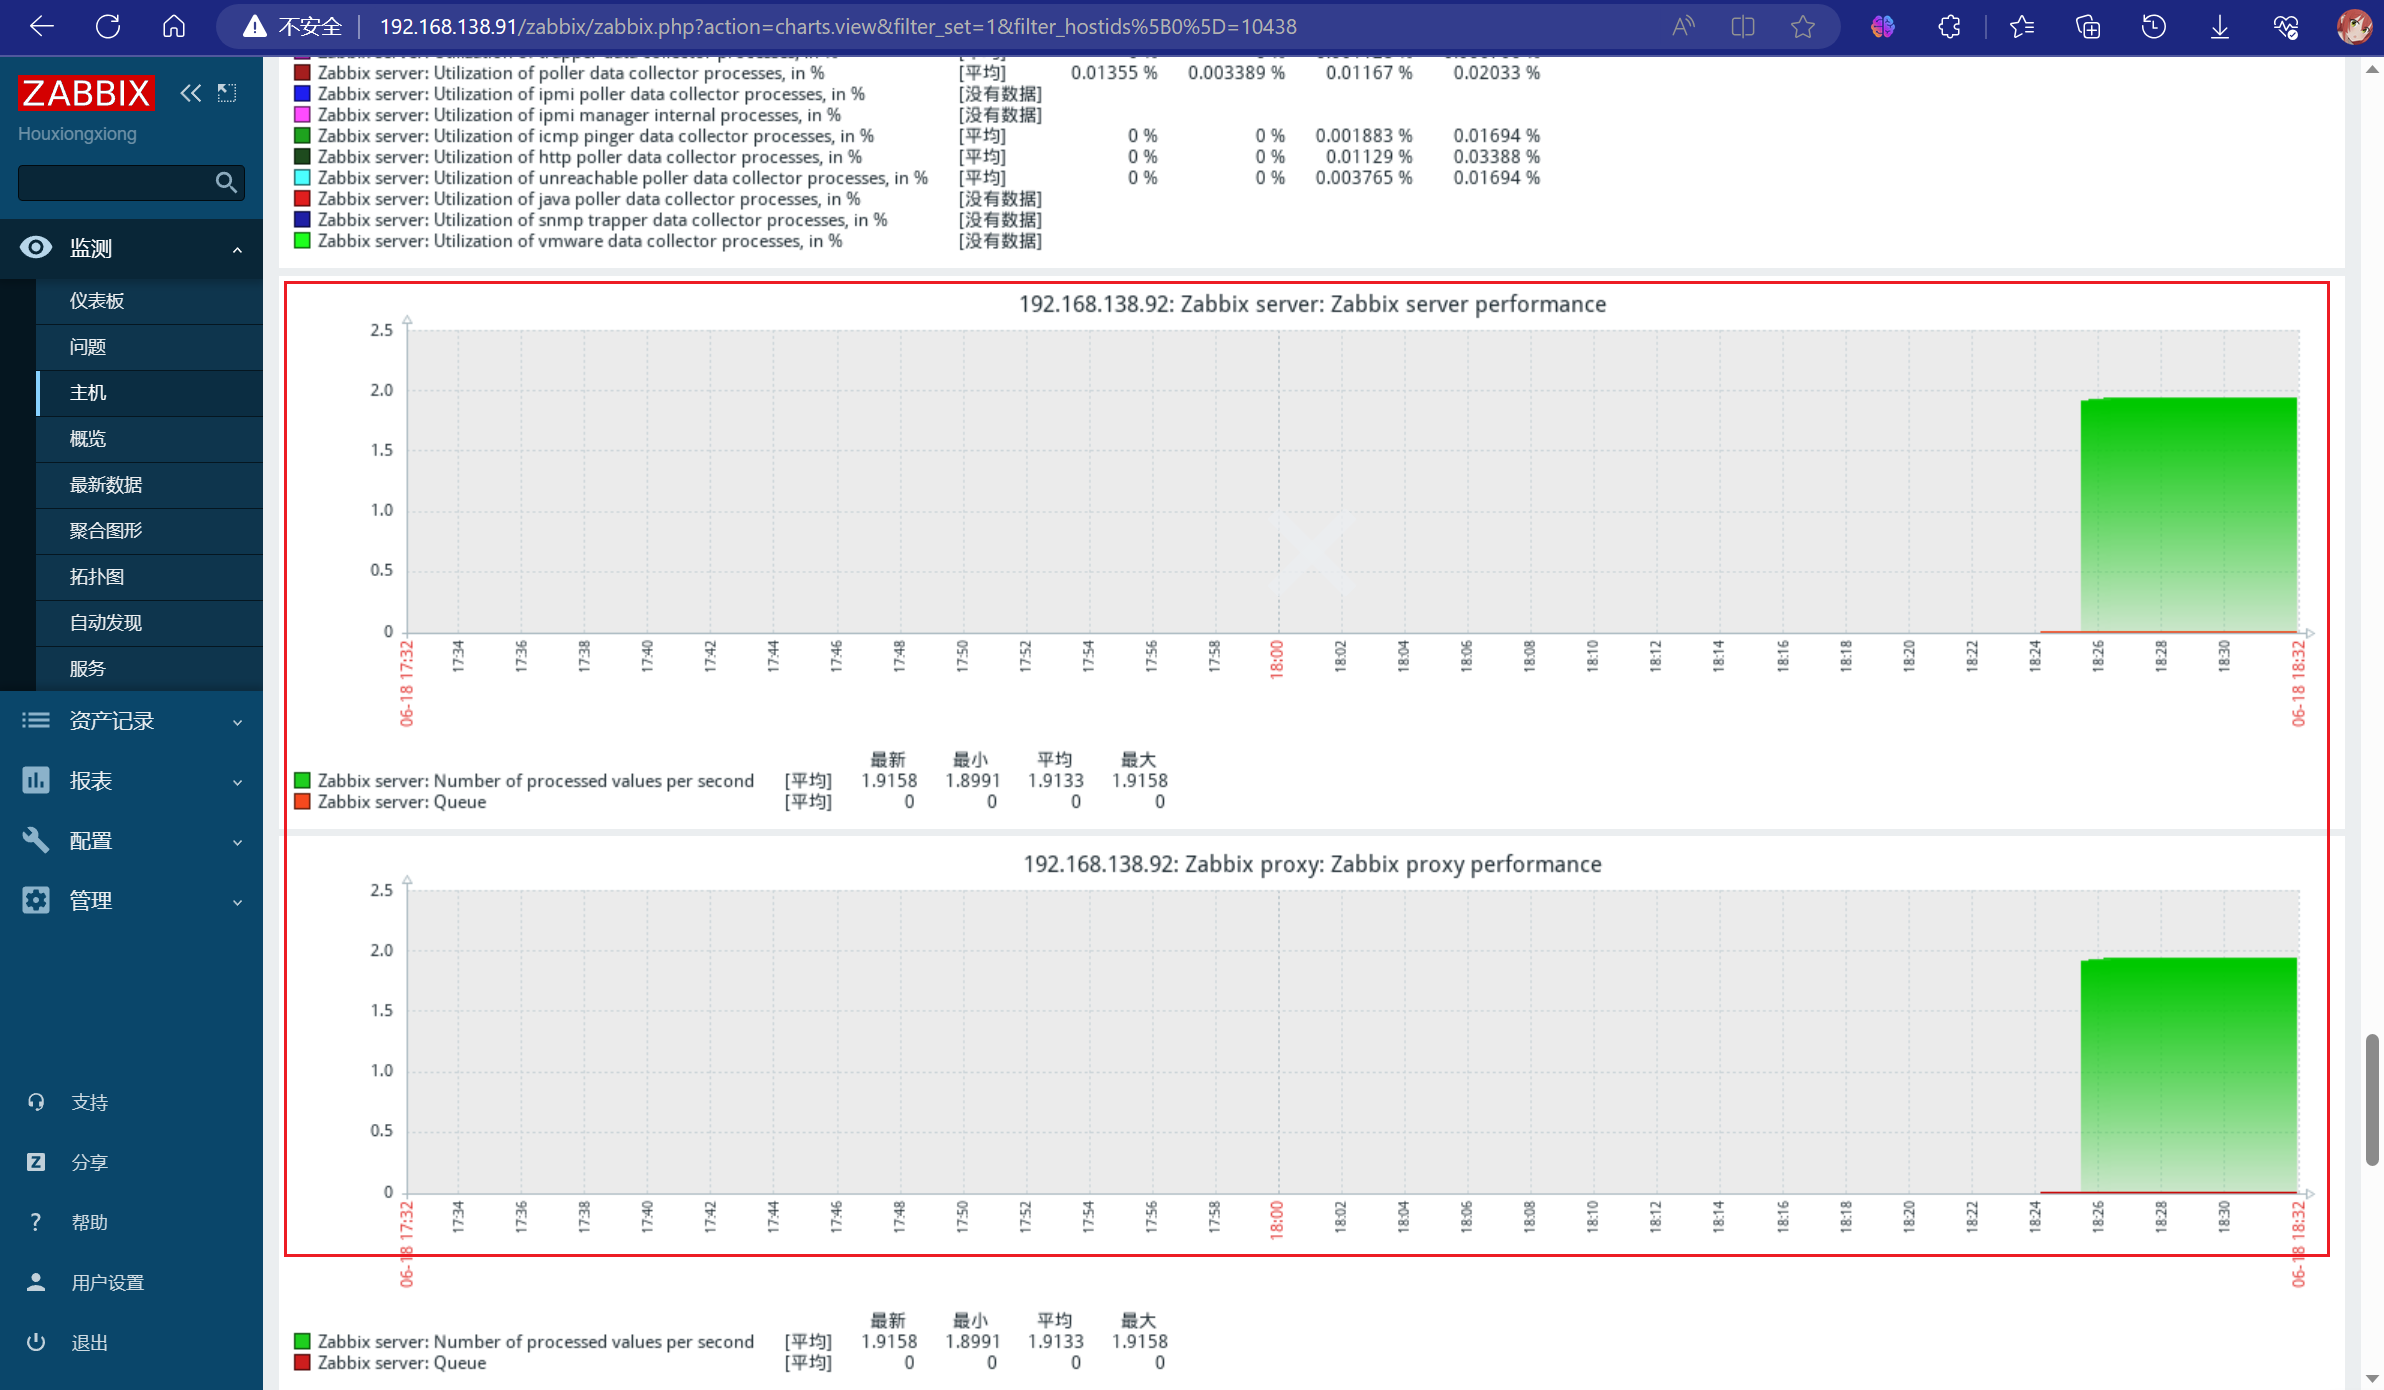
4.查看监控图形
